RallyLab User Guide
Everything you need to set up and run a pinewood derby with RallyLab.
Chapter 1: Getting Started
1.1 Login Screen
The login screen is the entry point to RallyLab. You can sign in with your email using a magic link, or try the demo mode to explore all features with sample data.
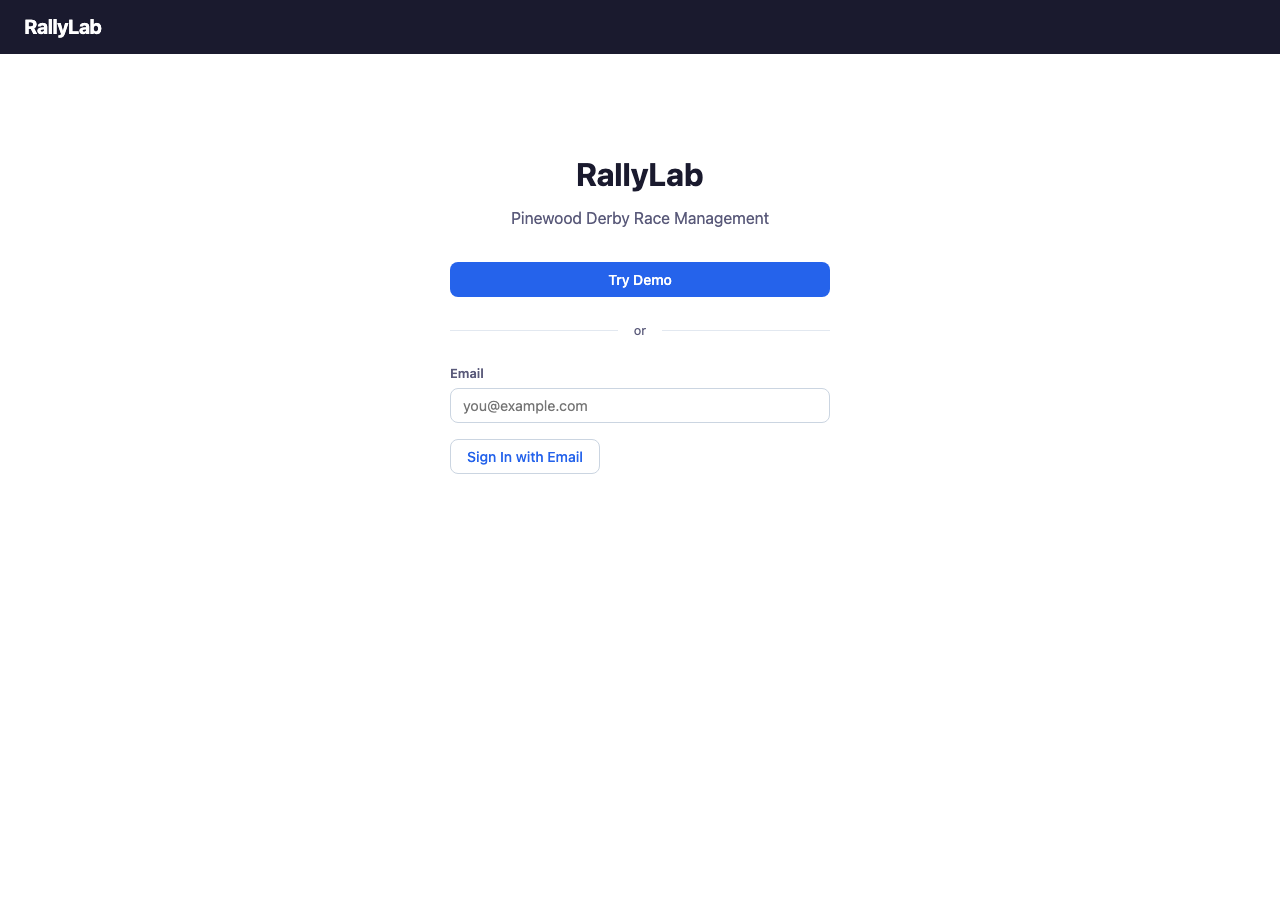
1.2 Demo Mode
Click "Try Demo" to load sample rally data and explore all features without signing in. Demo mode creates a sample rally with three sections (Beaver Buggies, Kub Kars, Scout Trucks), groups, and participant rosters.
Chapter 2: Pre-Race Registration
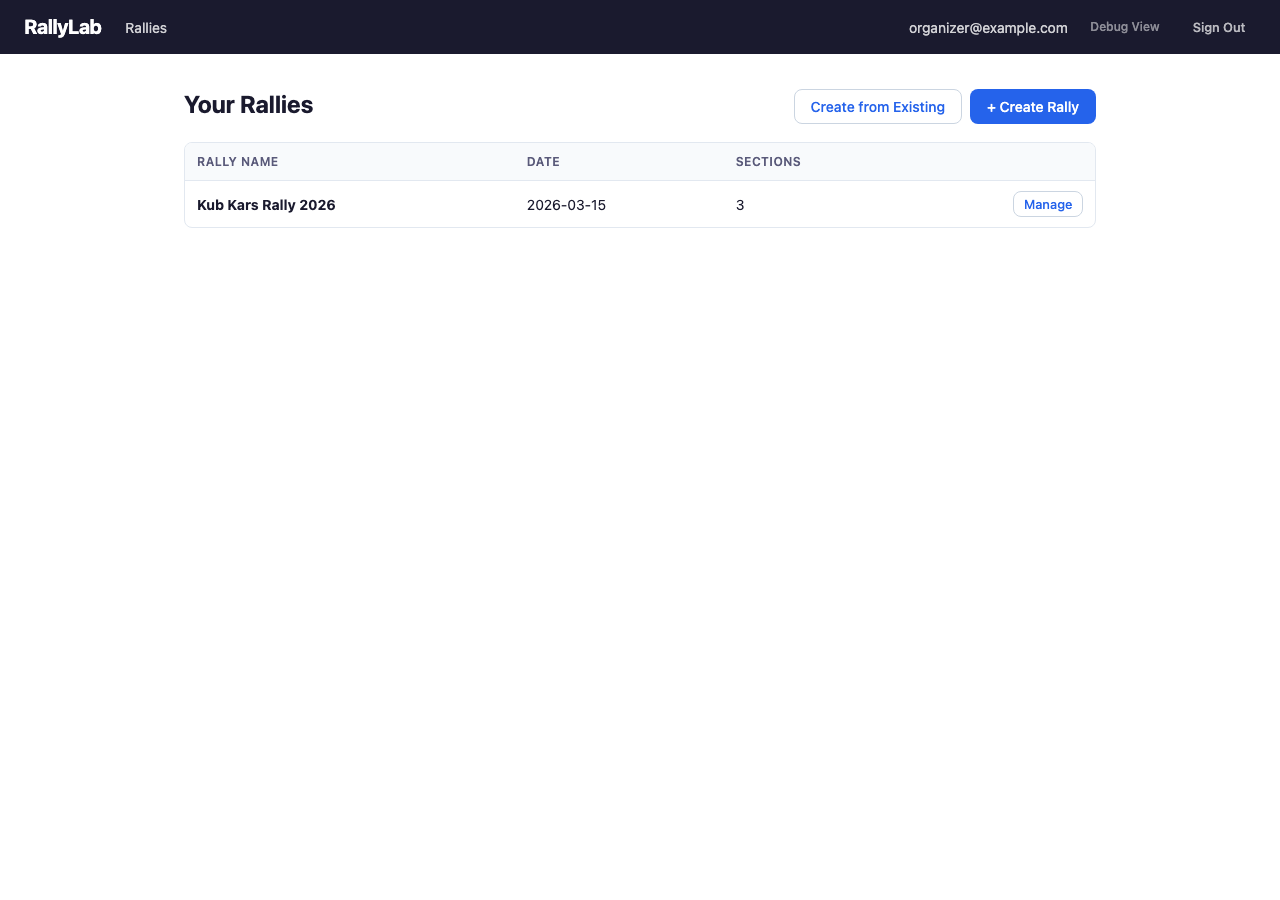
2.1 Rally List
The rally list shows all rallies you have access to. From here you can create a new rally or manage an existing one.
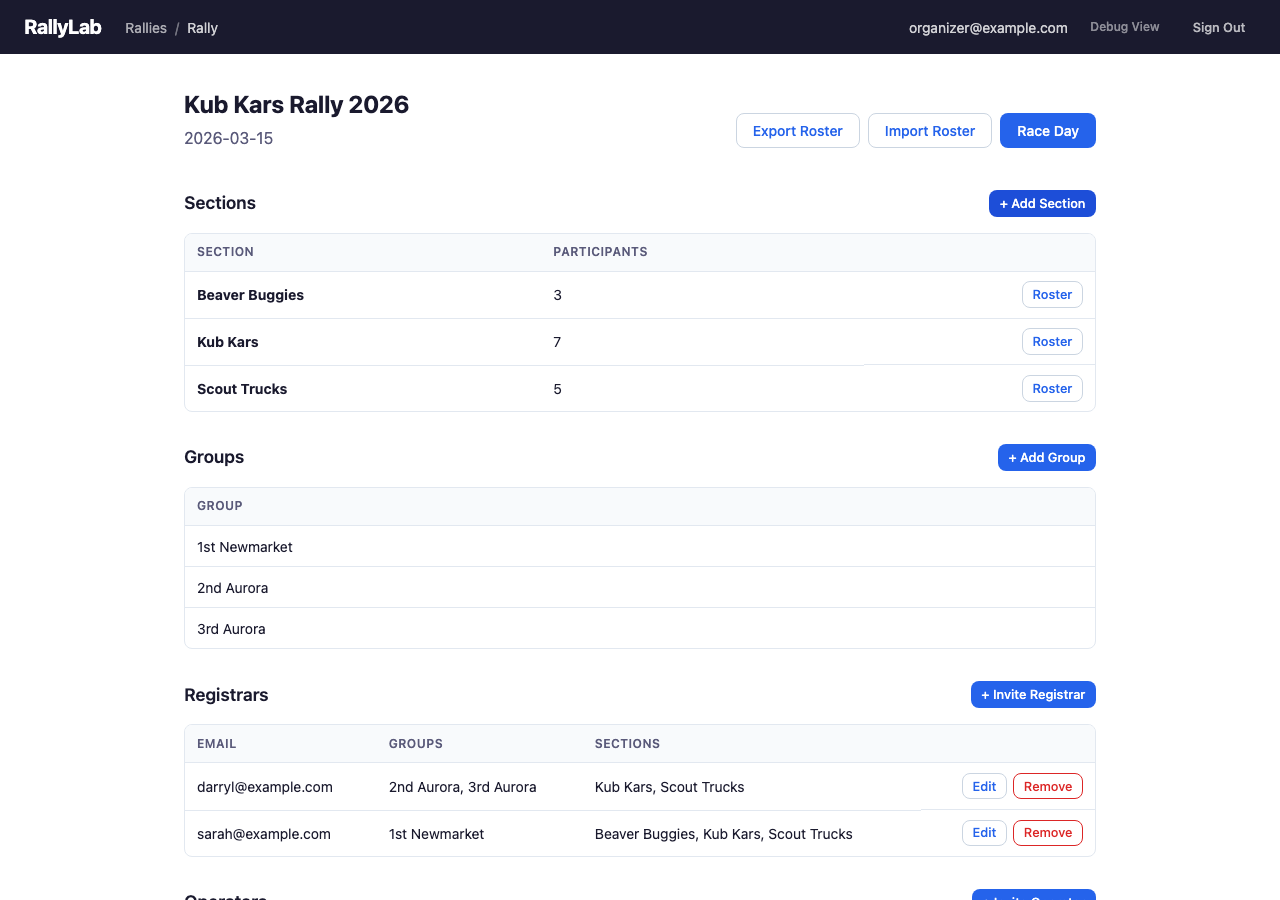
2.2 Rally Home (Organizer Dashboard)
The rally home screen is the central dashboard for managing a rally before race day. It shows sections with participant counts, groups, invited registrars, and operators. Use the action buttons to add sections, groups, and invite collaborators.
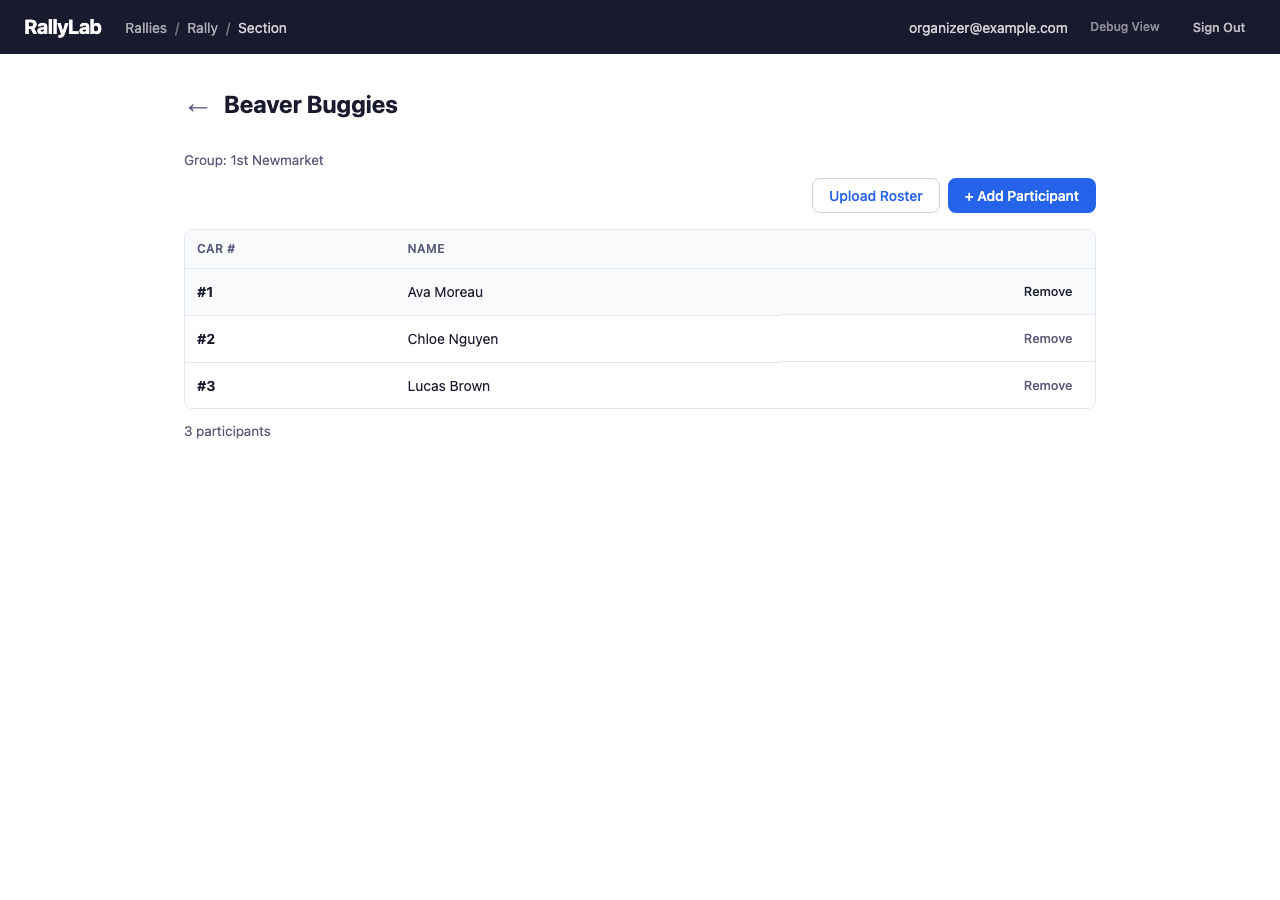
2.3 Section Detail — Full Roster
The section detail view shows all participants in a section, organized by group. Each participant shows their assigned car number and name. You can upload a roster from a spreadsheet or add participants individually.

2.4 Section Detail — Group Roster
When viewing a section filtered by group, only participants from that group are shown. This is the view a registrar sees when managing their assigned group.
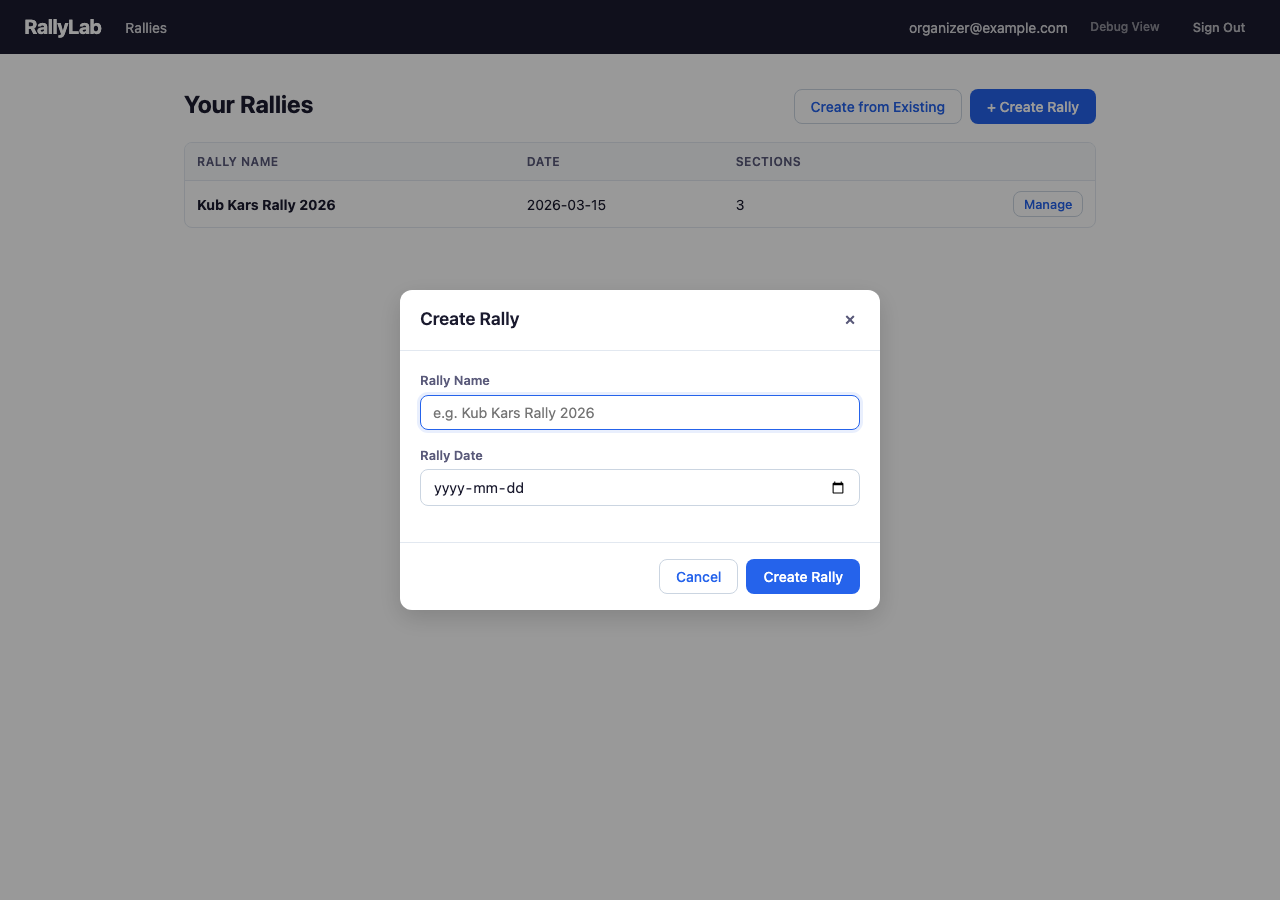
2.5 Creating a Rally
The Create Rally dialog lets you set the rally name and date. After creation, you can add sections, groups, and invite collaborators.
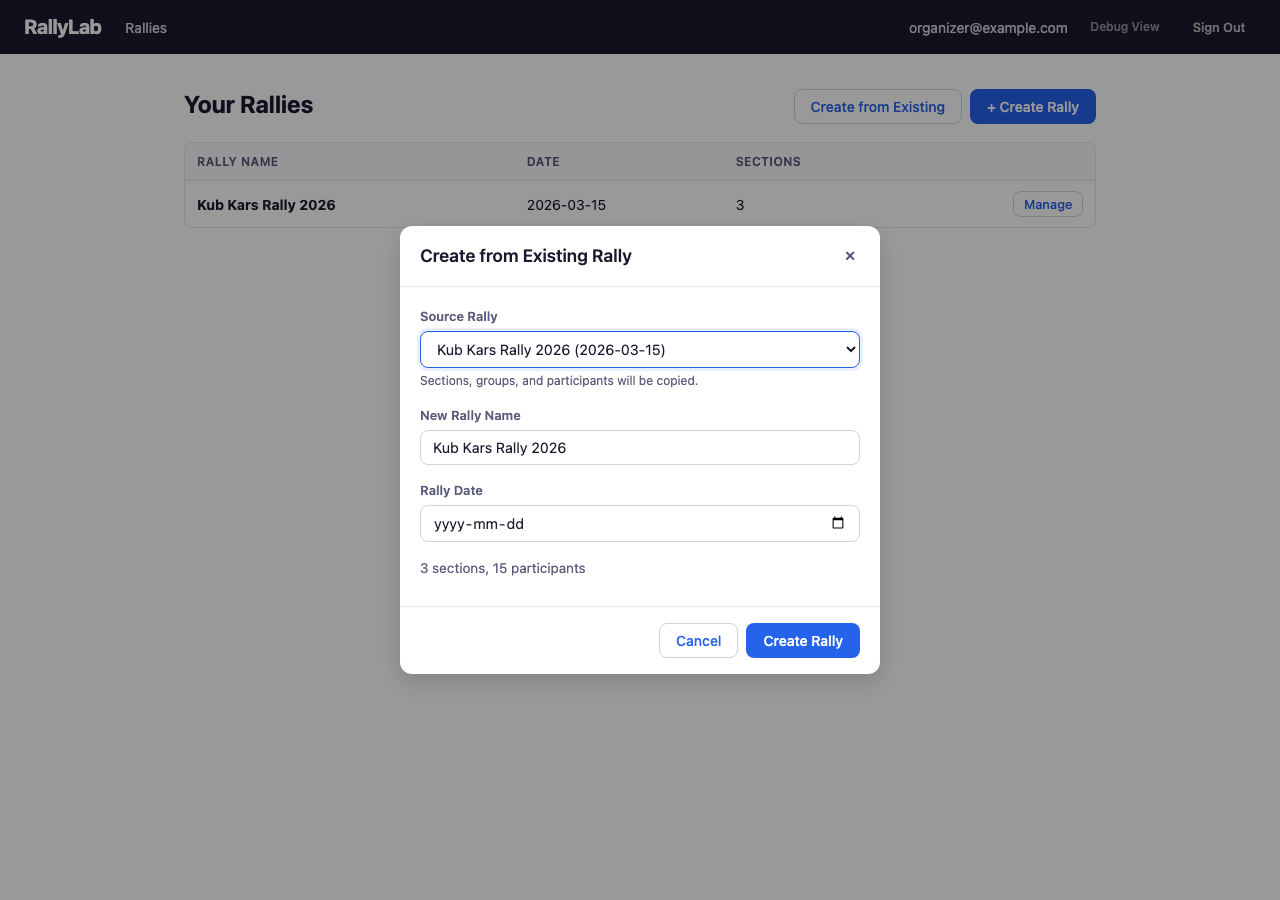
2.6 Create from Existing Rally
If you're running a similar event again, use “Create from Existing” to clone an existing rally's sections, groups, and full participant roster into a new rally. Select the source rally, give the new one a name and date, and all participants are copied with fresh car numbers.
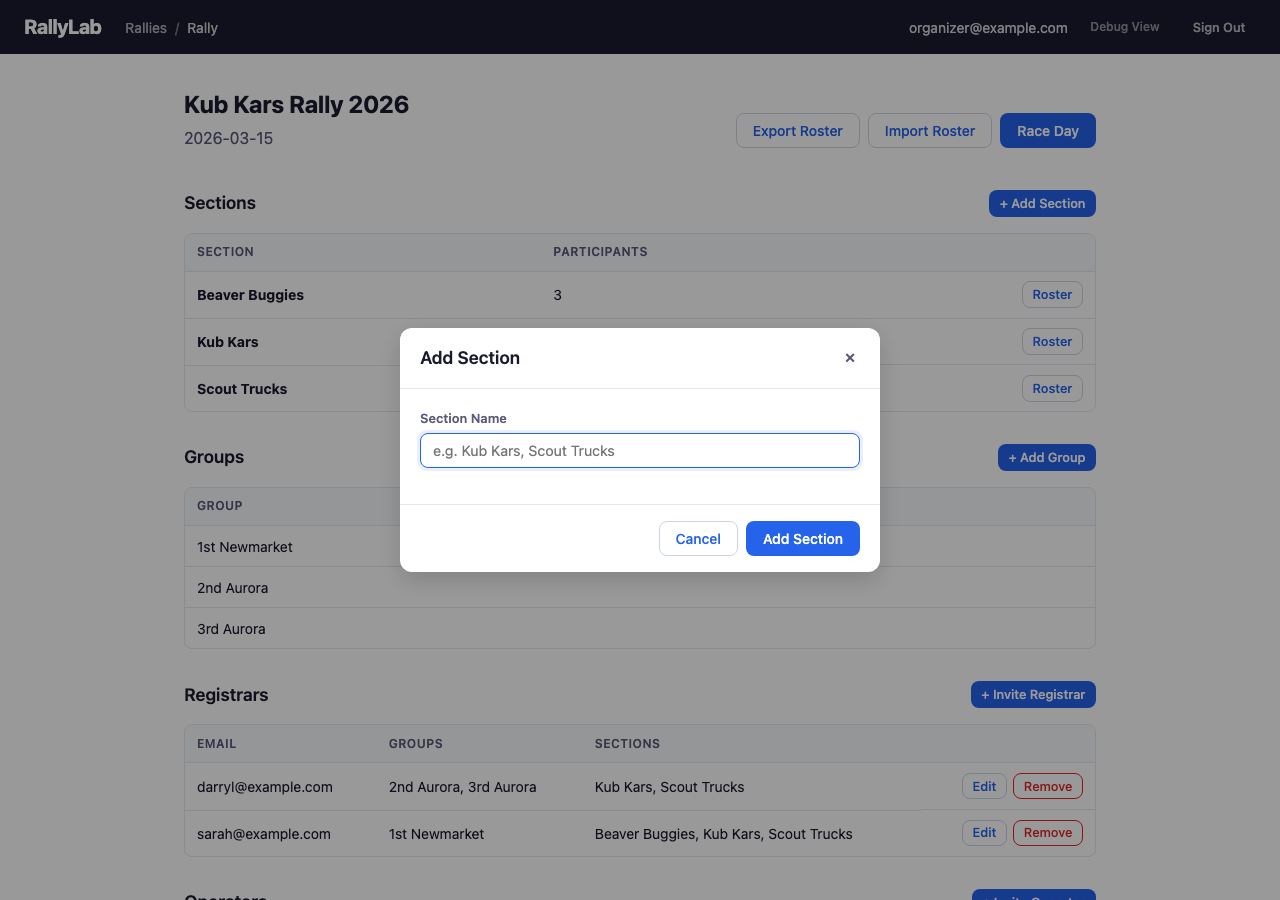
2.7 Adding Sections
Add sections to organize your rally by age group or category. Common sections are Beaver Buggies, Kub Kars, and Scout Trucks.
2.8 Adding Groups
Groups represent Scout troops or packs (e.g., "1st Newmarket", "2nd Aurora"). Groups help organize participants and can be assigned to registrars for distributed check-in.

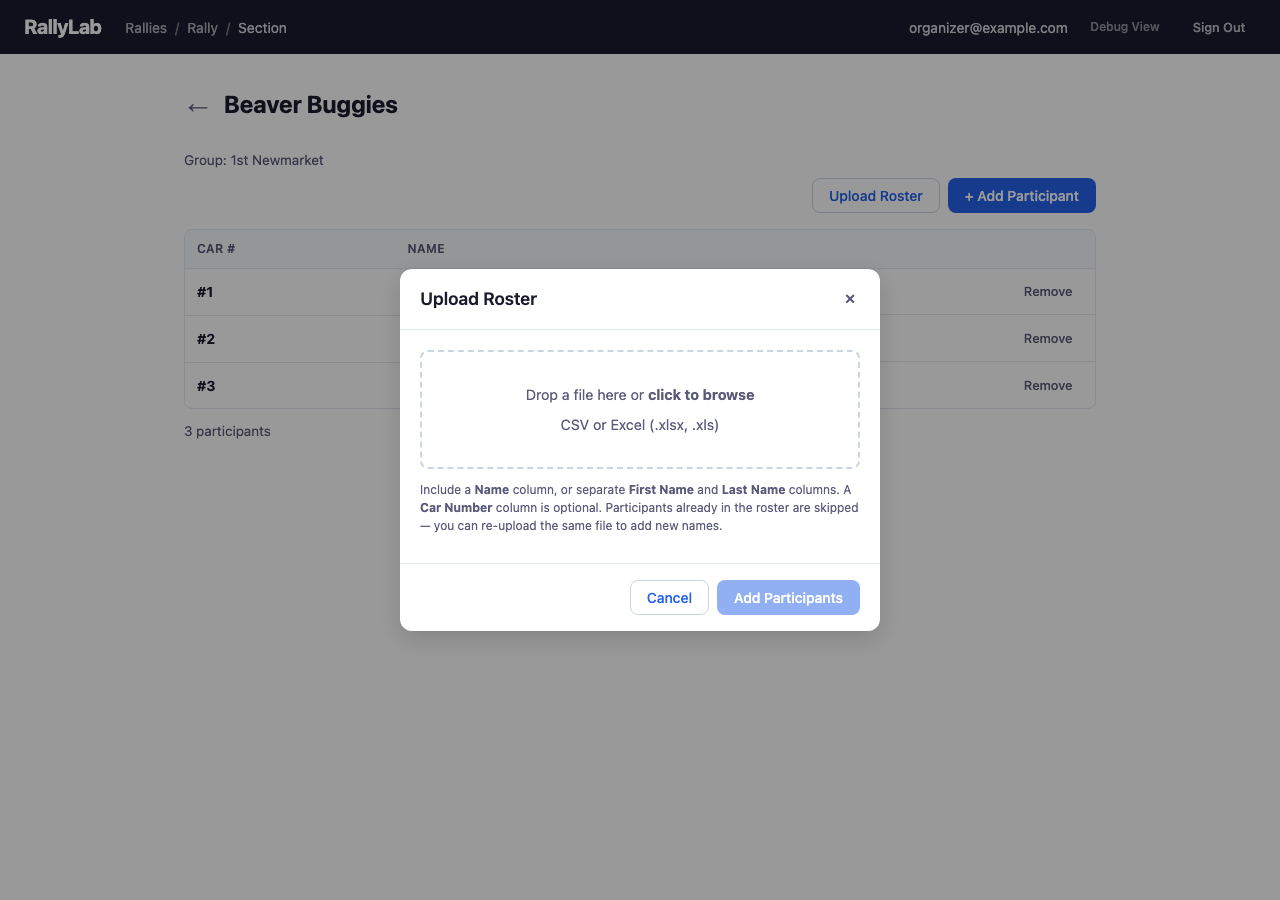
2.9 Uploading a Roster
Upload participants from a CSV or Excel spreadsheet. The system automatically detects column mappings for participant names and group assignments.
Imports are additive. Re-uploading the same file (with a few new rows added) only adds the new participants — anyone already in the roster is skipped. Existing car numbers, check-in status, and participant IDs are preserved. A volunteer can maintain a single spreadsheet and re-import it any time without creating duplicates.
Duplicate detection matches by Car Number (anywhere in the section) or by Name (within the same group, case-insensitive).
Include a Car Number column (or Race Number / #) if you want specific numbers preserved — the imported value is used verbatim, so labels like B100 or A-17 are kept as-is. Without such a column, car numbers are auto-assigned as 1, 2, 3, … gap-filling around any existing participants in the section.
The preview shows how many rows will be added and how many will be skipped, with a status badge next to each name.
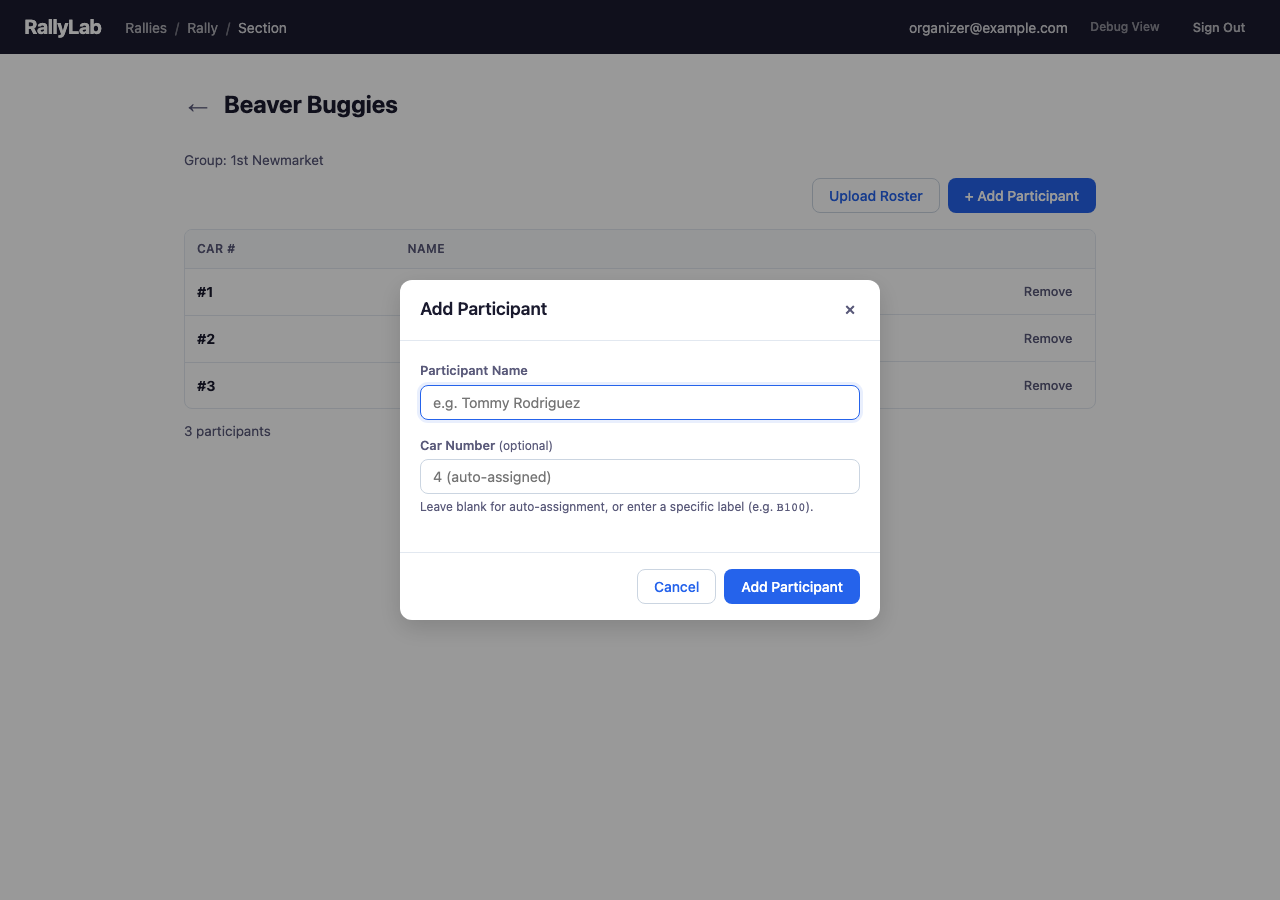
2.10 Adding a Participant
Add individual participants manually. Leave the Car Number field blank and one will be auto-assigned based on the next available number in the section. To preserve a label that matches the physical car (e.g. B100), enter it in the Car Number field — the value is stored verbatim. The dialog flags numbers already in use before you submit.
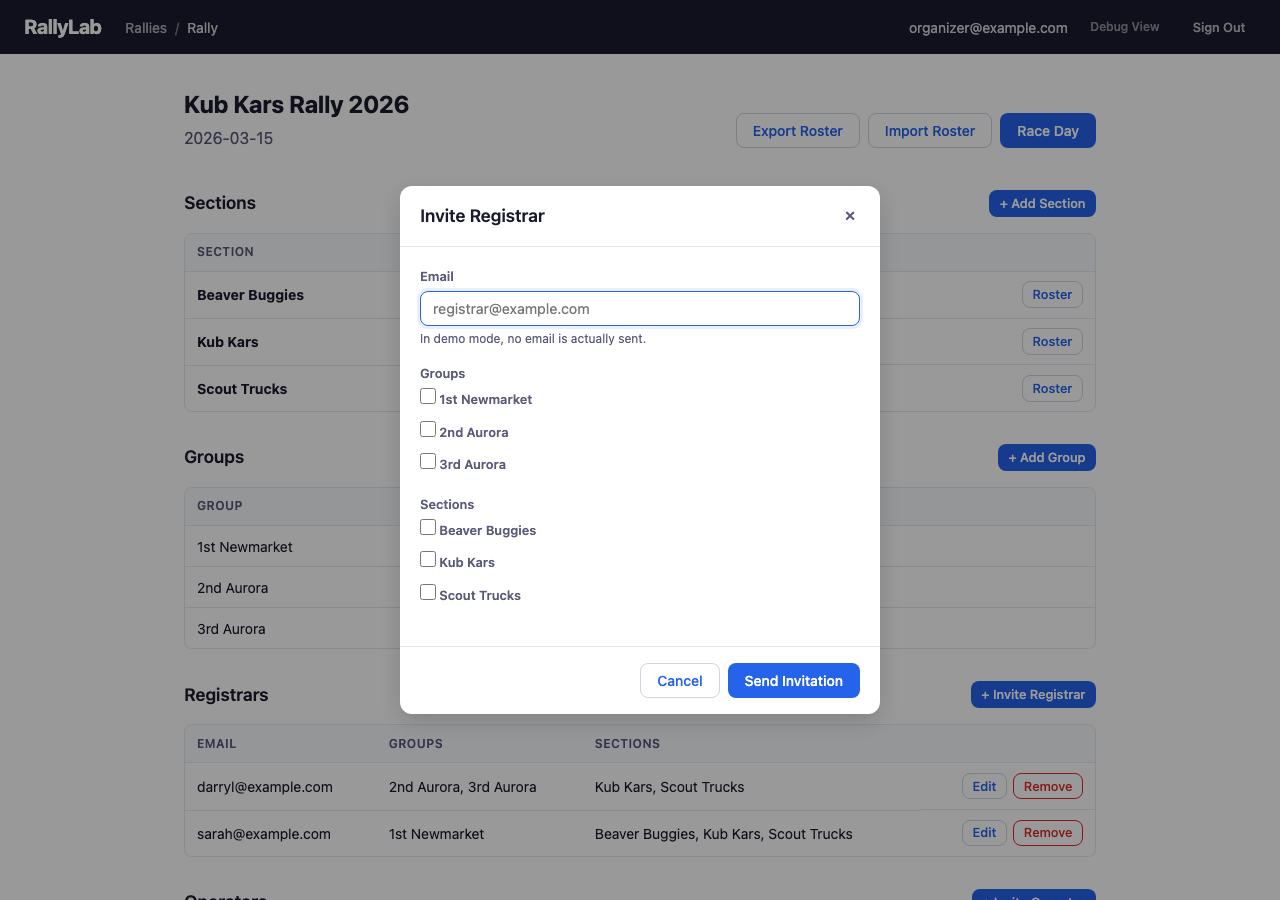
2.11 Inviting a Registrar
Invite a registrar by email to help manage check-in on race day. You can assign them to specific groups and sections, controlling what they can see and manage.
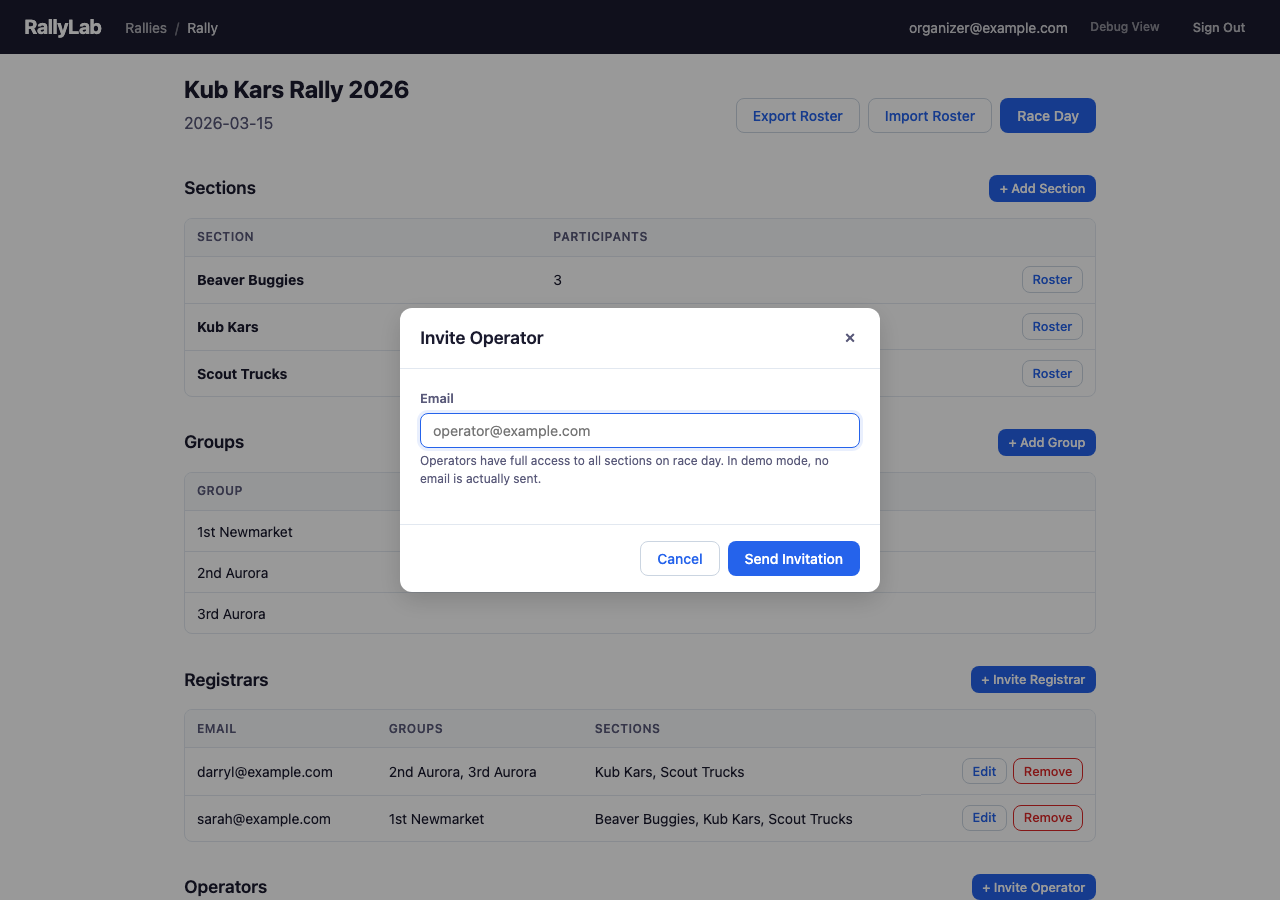
2.12 Inviting an Operator
Invite an additional operator by email to help run the race day console. Operators have full control over the race flow.
Chapter 3: Race Day — Operator Console
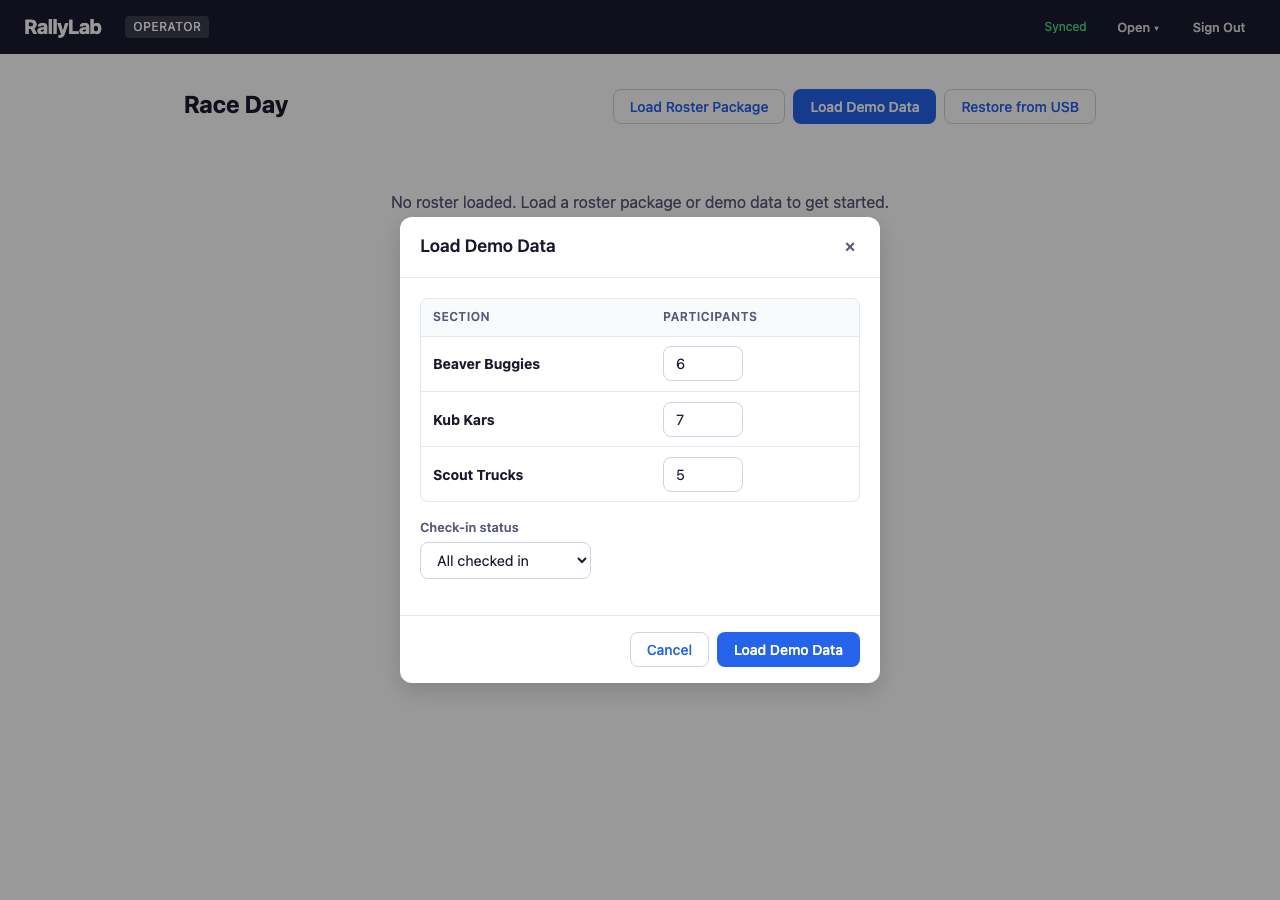
3.1 Loading Race Data
On race day, the operator loads participant data either from a roster package exported during pre-race, or by loading demo data for testing. The demo data dialog lets you configure the number of participants per section and their check-in status.
3.2 Rally Home
The operator rally home shows all sections with their participant counts, check-in progress, and status. From here you can check in participants, start racing a section, or view the live console for an active section. The track connection badge in the top-right opens the Track Manager.
Entrants (PDF) and Entrants (Excel) buttons below the section table produce a printable entrants list — one page or sheet per section, with an "Arrived" column you can tick off on paper. Useful as a check-in sheet at the door or for handing to a section lead before racing starts.

3.3 Track Connection
Click the track badge on the Rally Home or Live Console screen to open the Track Manager dialog. RallyLab supports three ways to connect to a Pico W track controller, plus a manual fallback:
- WiFi — Enter the Pico's IP address or
.localhostname (e.g.,pack42.local) and click Connect WiFi. The controller communicates over HTTP, so no USB cable is needed during the race. The address is remembered for reconnection. - USB — Click Connect USB to use Web Serial (Chrome/Edge only). While connected via USB, you can also configure the Pico's WiFi from the Track Manager — scan for networks, enter a password, and switch to wireless. The Track Manager also lets you set a custom hostname so the Pico is reachable at a memorable
.localaddress instead of an IP. - Fake Track — Open the fake track simulator (
debug.html) in another tab. It connects automatically via BroadcastChannel for testing without hardware. - Manual — No track controller. The operator clicks “Run Heat” and “Next Heat” buttons to advance through the race, and uses Manual Rank to enter results by hand.
When a track is connected (WiFi, USB, or Fake), gate release and finish times are detected automatically. The connection status is shown as a badge on both the Rally Home and Live Console screens.
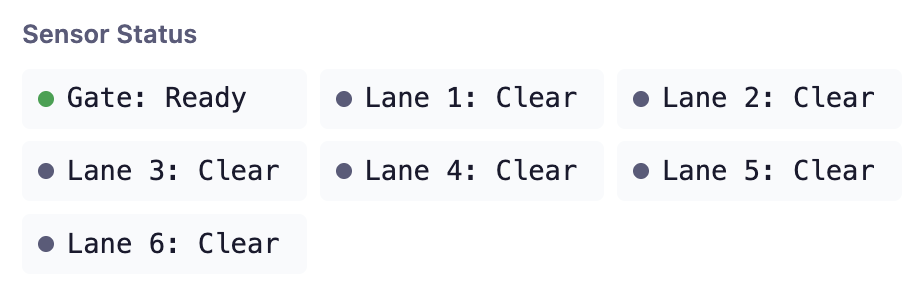
When connected via USB or WiFi, the Track Manager also shows a Sensor Status panel with live readings from the gate switch and each lane sensor. This helps diagnose hardware issues — you can see whether the gate registers as open or closed, and whether individual lane sensors are triggering correctly.
3.4 Check-In
The check-in screen shows all participants in a section with checkboxes to mark their arrival. Once at least 2 participants are checked in, the "Start This Section" button becomes available.

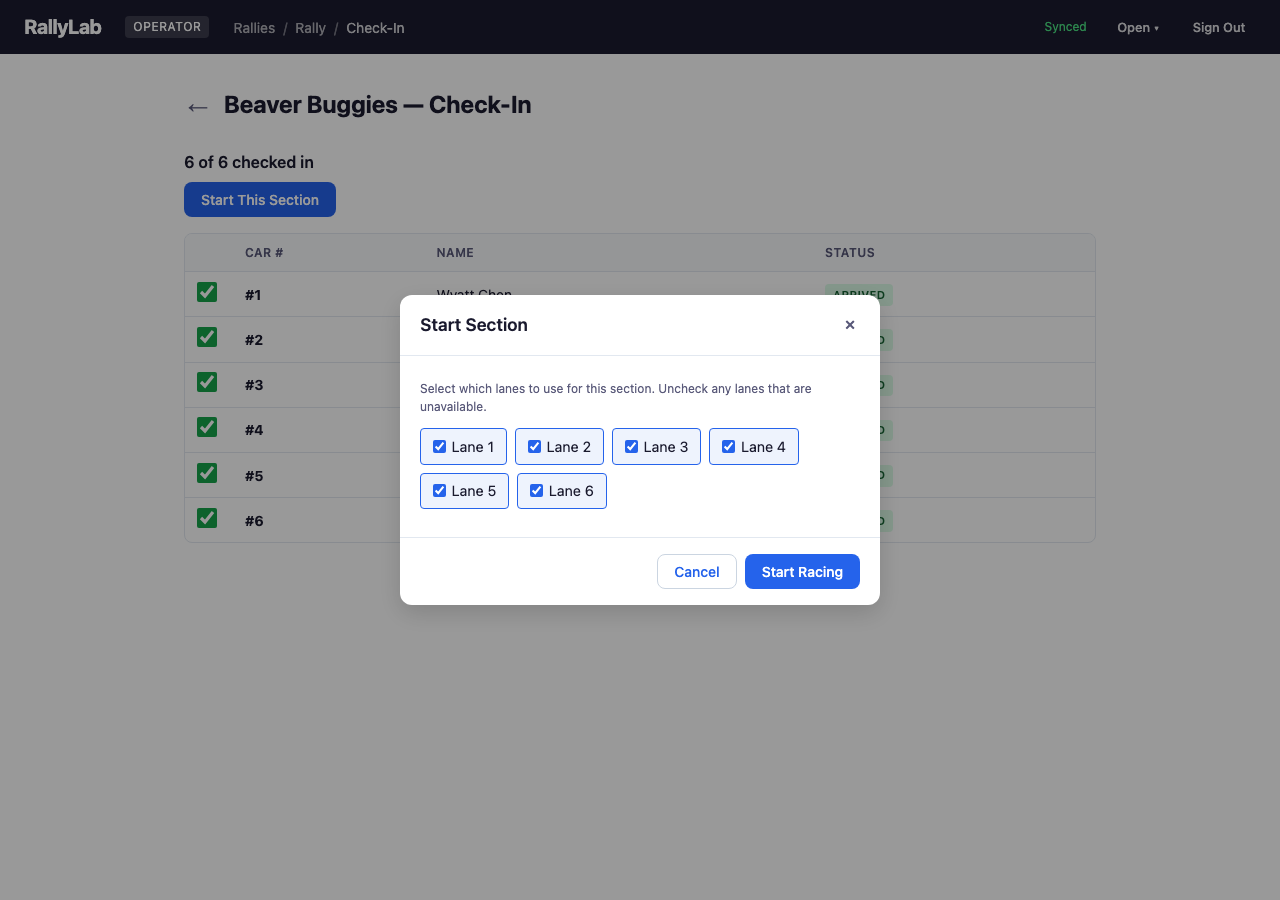
3.5 Starting a Section
The Start Section dialog lets you choose which lanes to use. Uncheck any lanes that are unavailable (e.g., broken sensor). The schedule is automatically generated based on available lanes and checked-in participants.
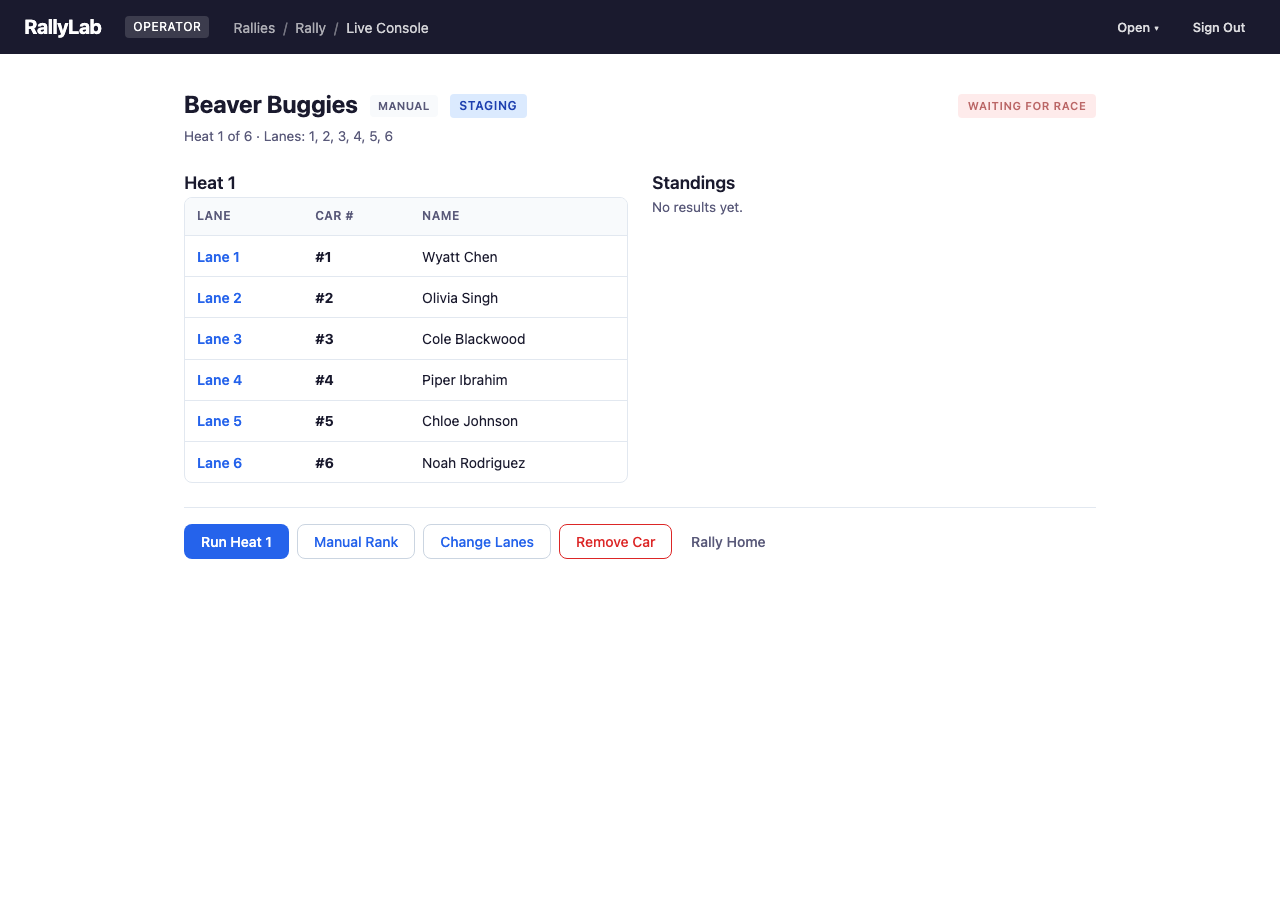
3.6 Live Console — Staging
During staging, the live console shows the current heat assignment with lane numbers, car numbers, and participant names. With a connected track, the system automatically detects the start gate release. In manual mode, click “Run Heat” to advance.
The header shows the connection mode (USB Track, WiFi Track, Fake Track, or Manual) and a track phase badge indicating the current state — Staging, Waiting for gate, Waiting for race, or Result. Click the phase badge to expand a timestamped log of phase transitions, which is useful for diagnosing timing issues.
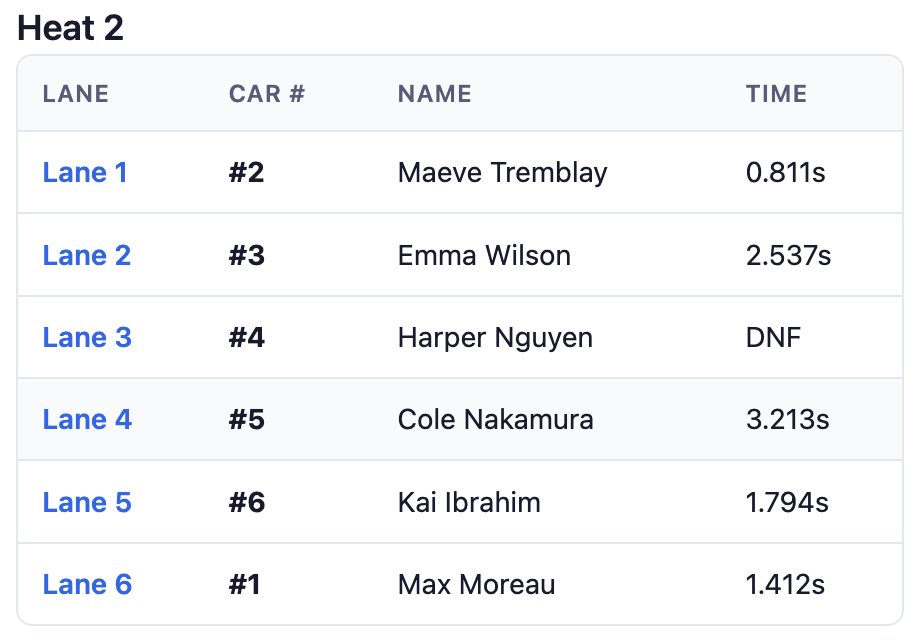
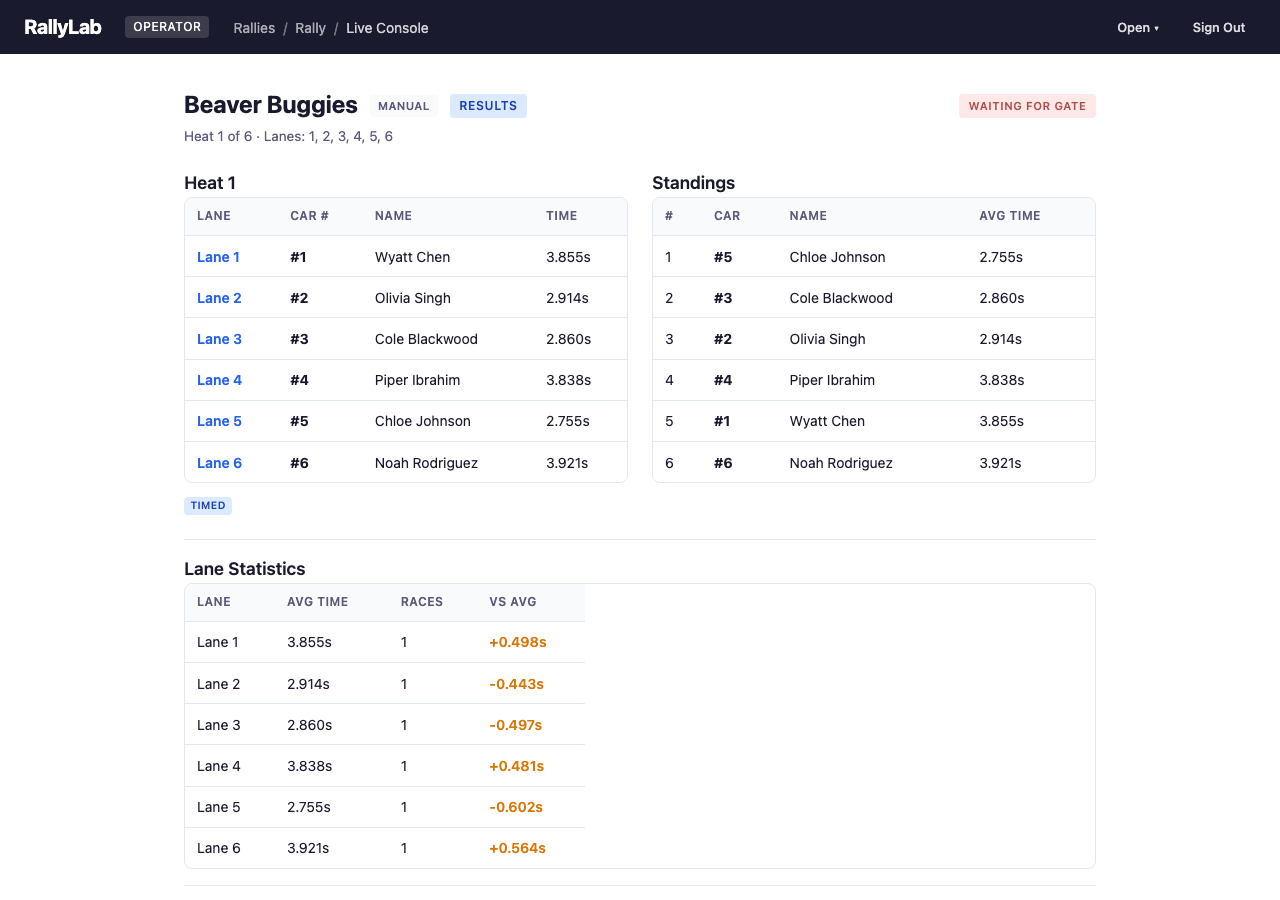
3.7 Live Console — Results
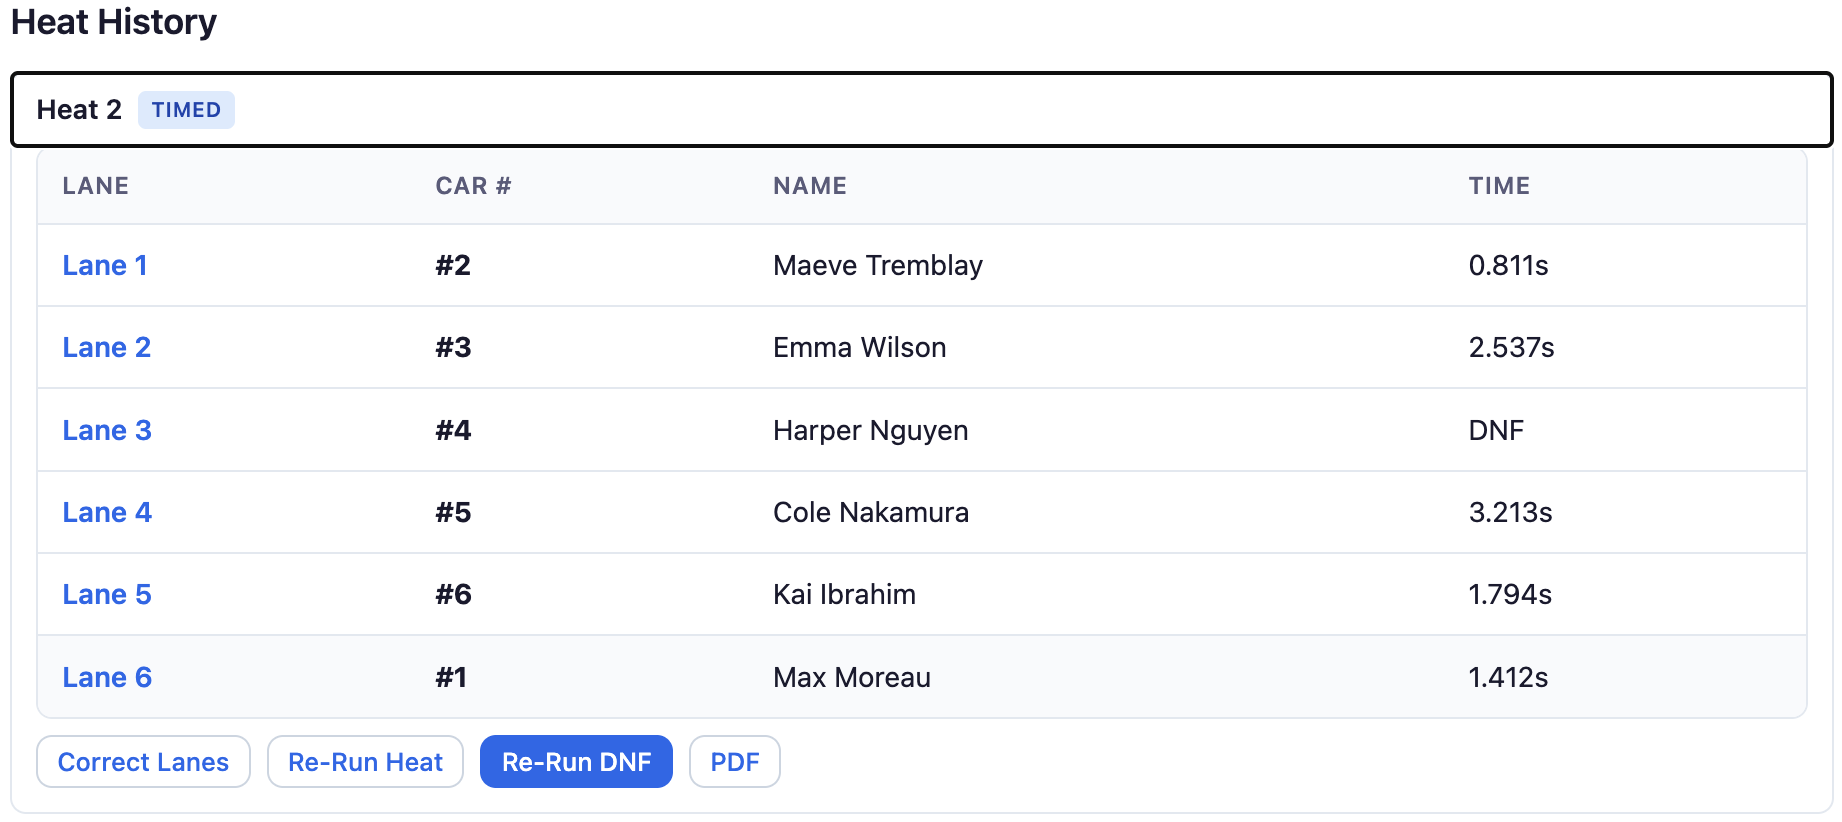
After a heat completes, the results panel shows finish times for each lane. If a car did not finish, its time shows as DNF (Did Not Finish). The standings panel on the right updates with cumulative average times. Click “Next Heat” to advance to the next heat, or “Re-Run” if there was an issue.
If a heat has DNF results, a Re-Run DNF button appears, allowing you to re-run only the cars that didn't finish while keeping the successful results. This is also available in the heat history for past heats.
3.8 Manual Rank
If the timing system fails for a heat, use Manual Rank to enter finish positions by hand. Assign a place (1st, 2nd, etc.) or DNF to each lane.
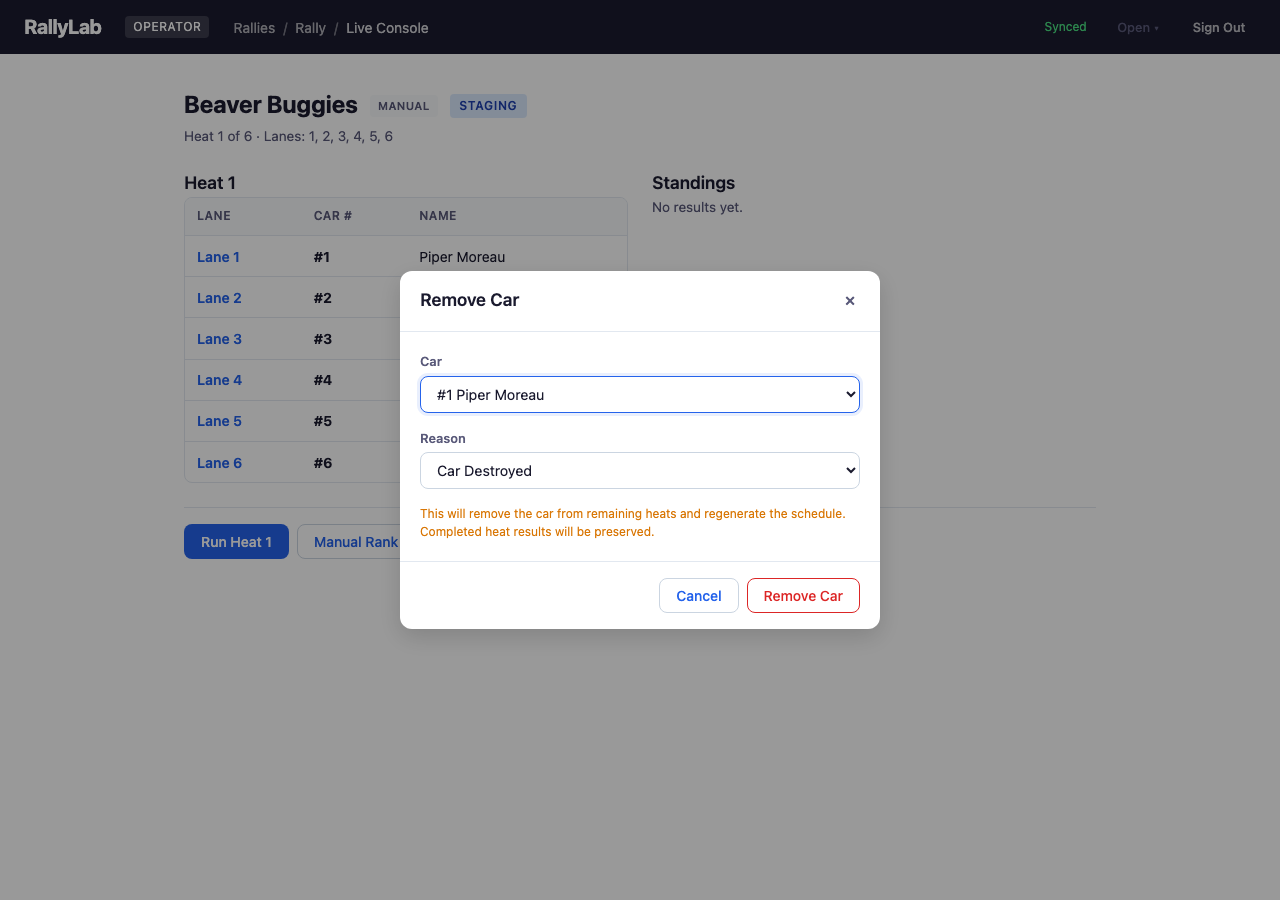
3.9 Remove Car
Remove a car from the remaining heats if it is destroyed, disqualified, or withdrawn. Completed heat results are preserved. The schedule is regenerated for remaining heats.
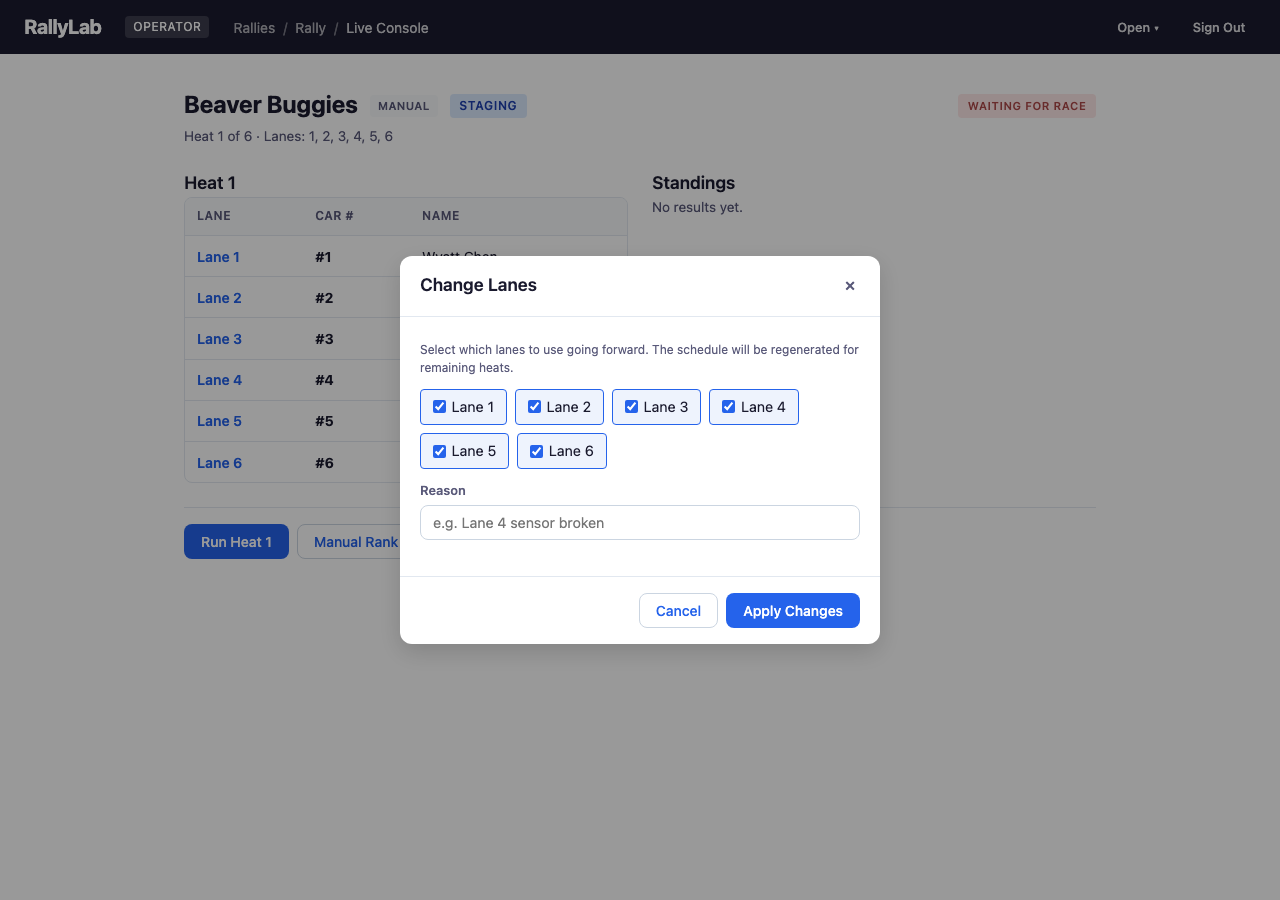
3.10 Change Lanes
Change which lanes are active mid-race (e.g., if a lane sensor breaks). The schedule is regenerated for remaining heats using the new lane configuration.
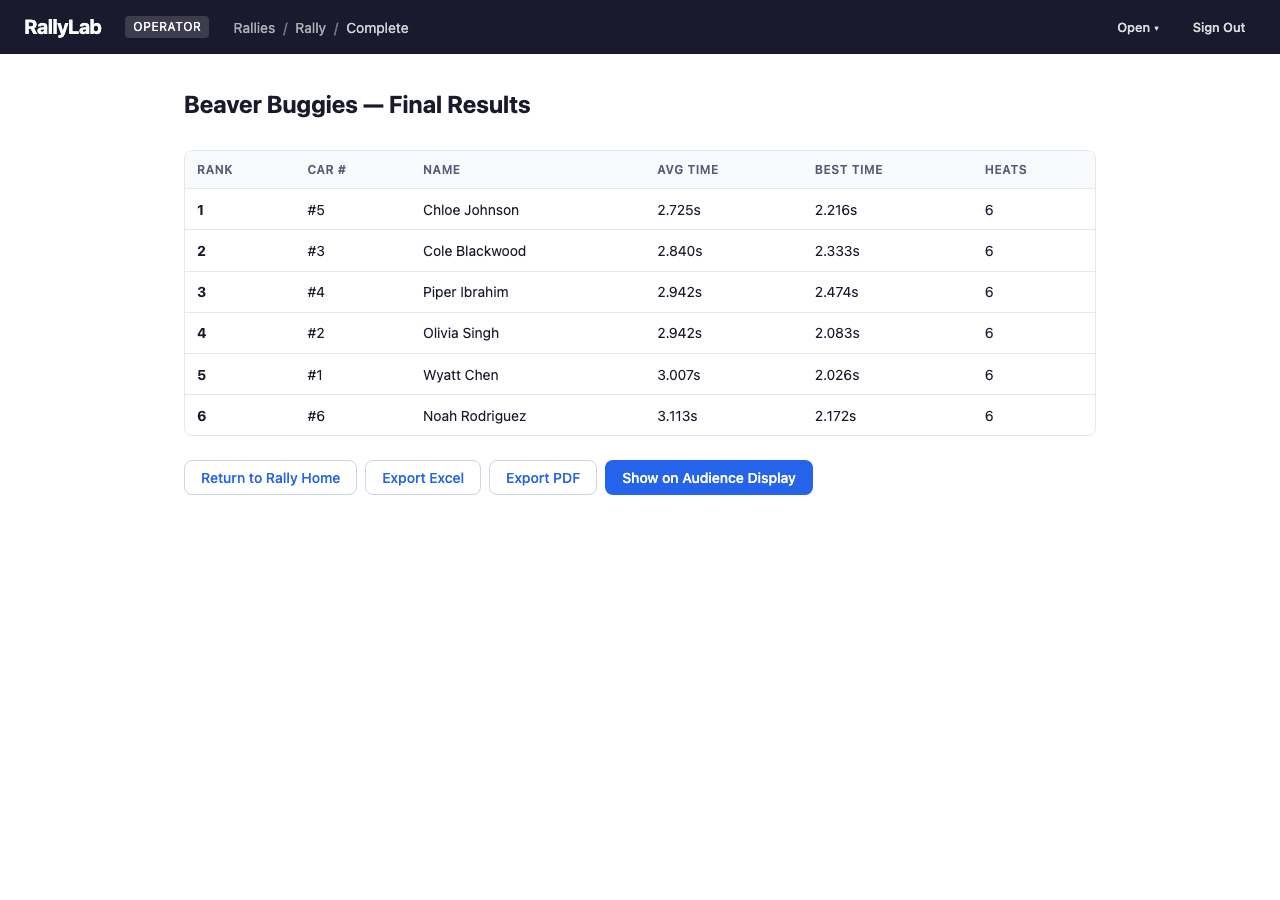
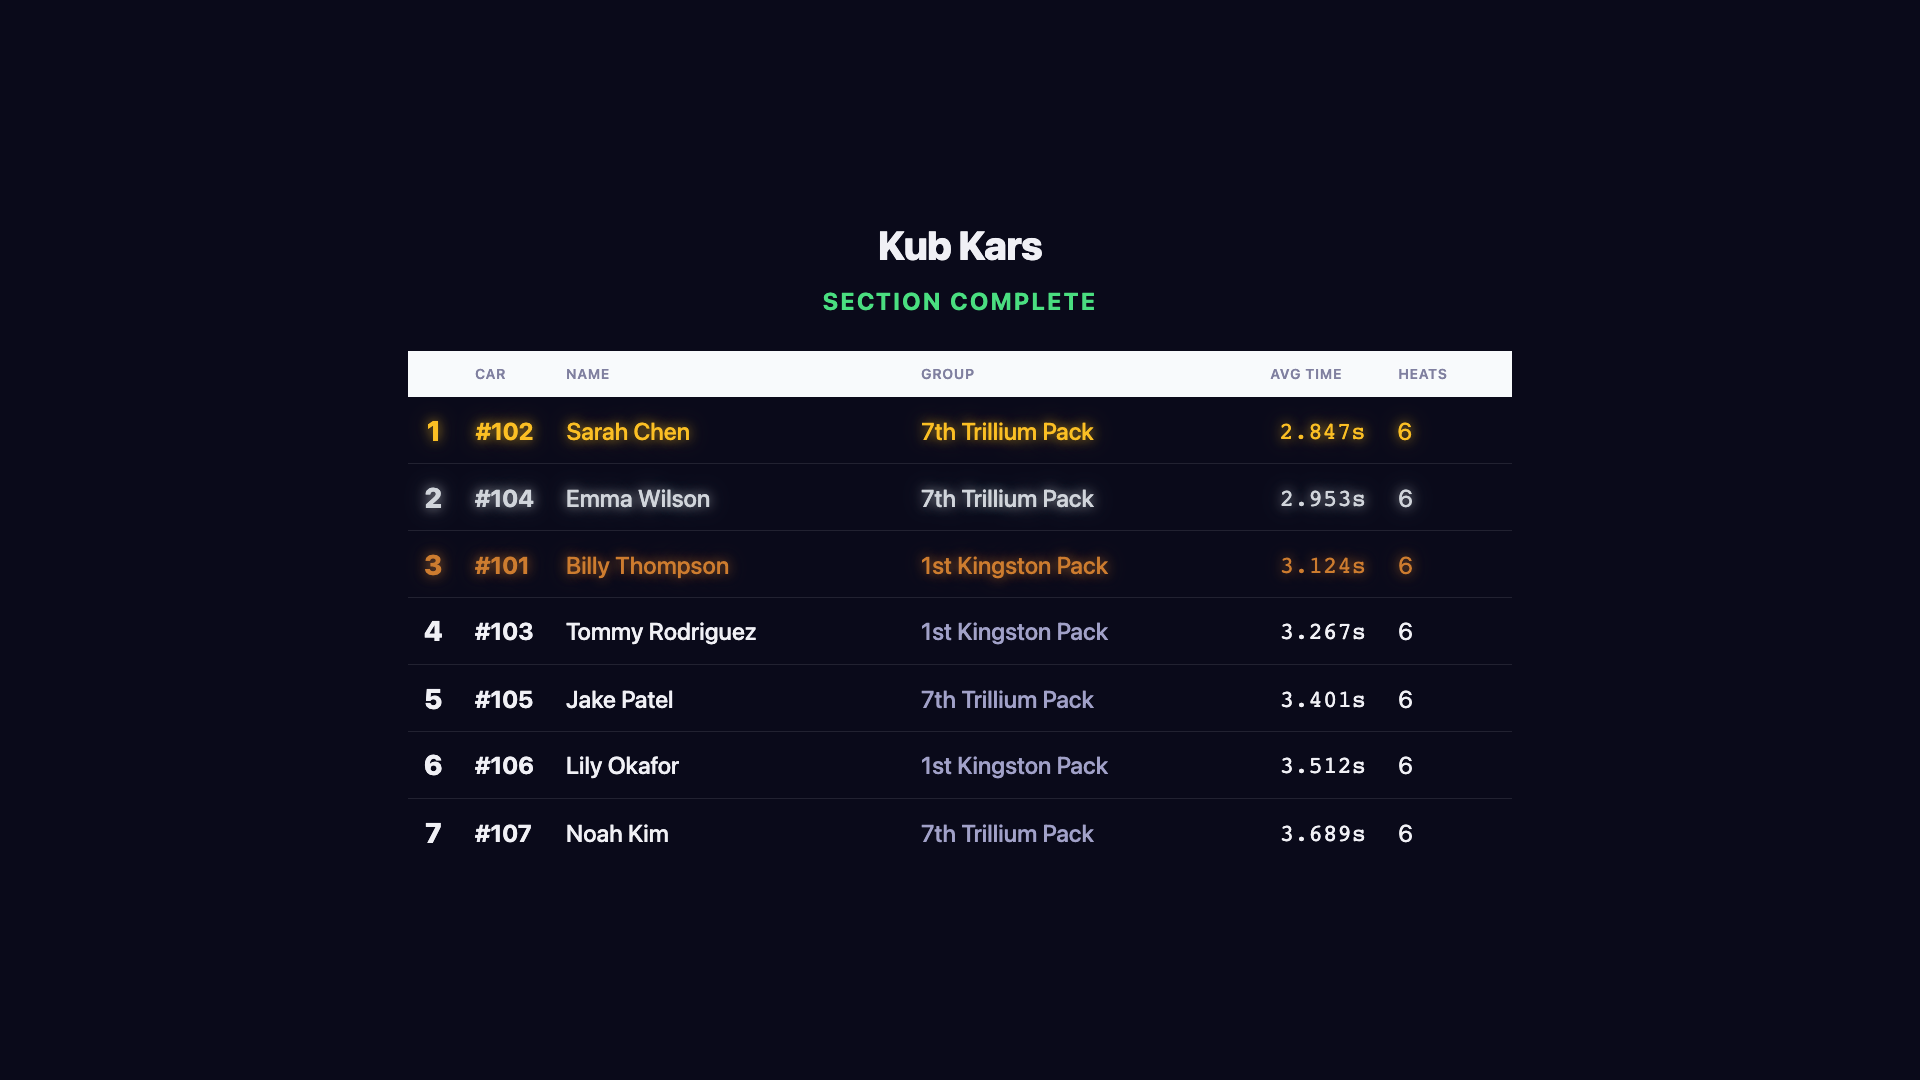
3.11 Section Complete / Final Results
When all heats are finished, the section complete screen shows final standings with rank, average time, best time, and heat count.
From this screen you can:
- Export Excel — Download a multi-sheet workbook with standings, heat-by-heat results, car statistics, and lane statistics
- Export PDF — Generate a detailed PDF report with standings, per-heat results, and car/lane statistics
- Show on Audience Display — Send results to the audience display for a dramatic progressive reveal, starting from last place and building up to first
If a section has been run multiple times (multiple rotations that were completed separately), a start picker appears at the top to switch between results for each run.
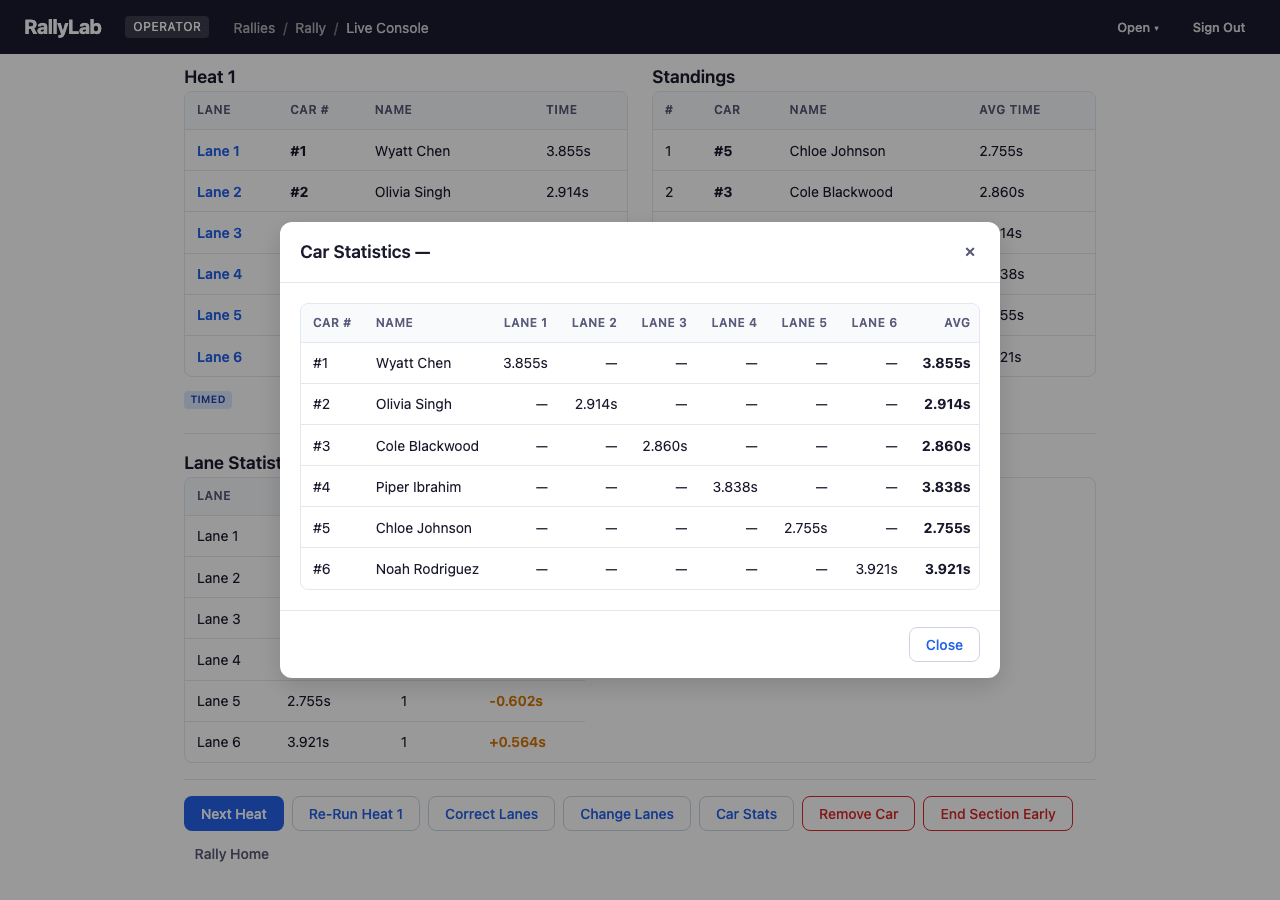
3.12 Car Statistics
Click Car Stats (available in the Live Console after at least one heat has results) to open a detailed per-car breakdown. The table shows each car's time on every lane, plus their average, best time, and total heats run. This helps identify cars that are consistently fast or slow on specific lanes.
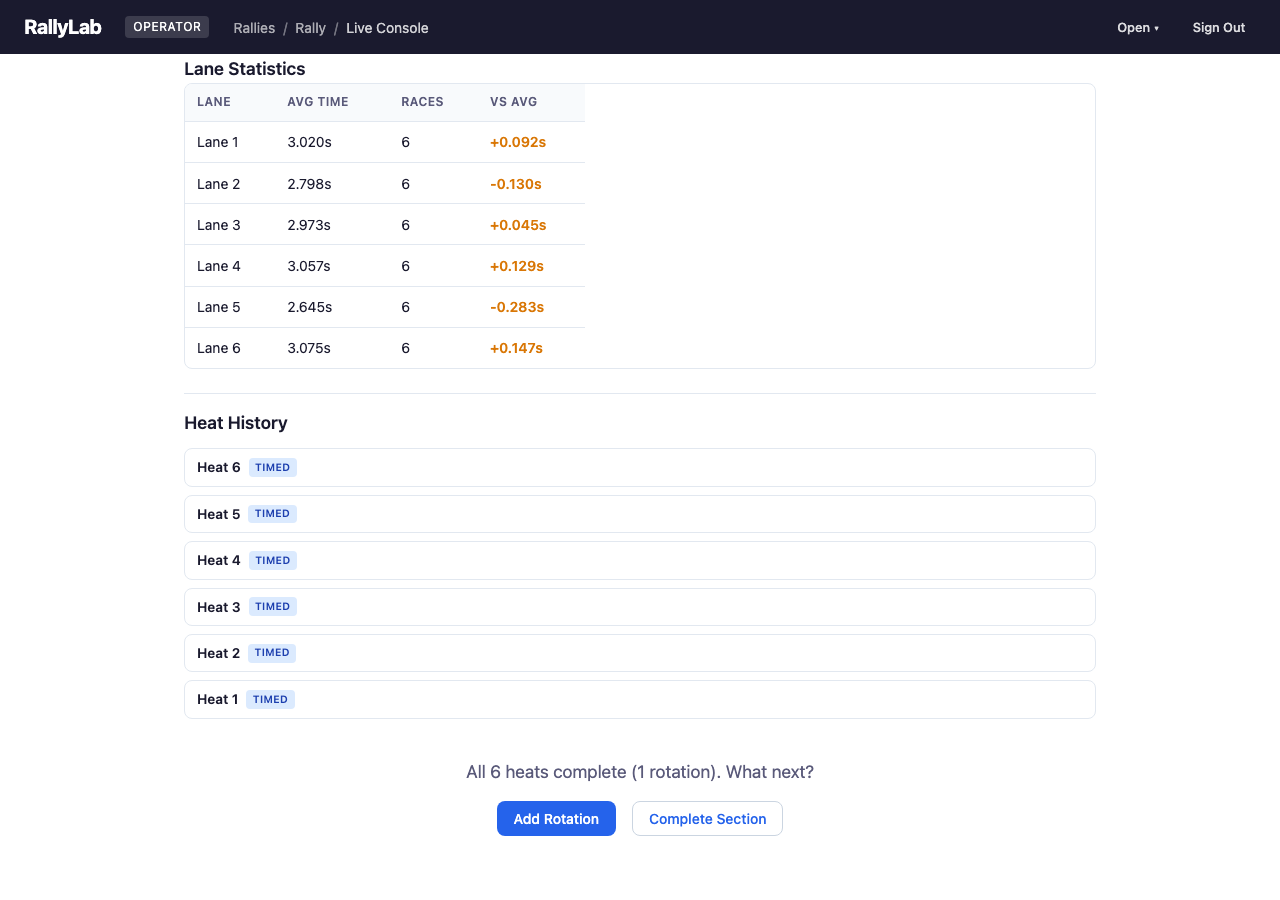
3.13 Lane Diagnostics
The Lane Statistics panel appears automatically below the standings in the Live Console after results are recorded. It shows the average time, race count, and deviation from the overall average for each lane. Lanes with a deviation greater than 20ms are highlighted as outliers — this can indicate a lane that is consistently faster or slower, which may point to a track alignment issue.
3.14 Multiple Rotations
After all heats in a rotation are complete, a rotation decision prompt appears with two options:
- Add Rotation — Schedule another full rotation of heats for the same participants. Useful when time allows for more racing to improve scoring accuracy.
- Complete Section — Finalize the section with the current results.
3.15 End Section Early
If you're running short on time, click End Section Early (the red button in the Live Console) to stop racing and finalize standings based on heats completed so far. Cars that ran fewer heats than others are marked as incomplete in the final results. This button only appears after at least one heat has been completed.
3.16 Reports
The operator can generate PDF reports from several places:
- Entrants List (from Rally Home) — A printable per-section roster with an "Arrived" column for paper check-in. Also available as Excel.
- Rally Report (from Rally Home) — A multi-page PDF covering all sections, with standings, lane statistics, and summary stats for the entire event.
- Group Reports (from Rally Home) — Per-group PDFs showing where each group's participants placed and their heat-by-heat times. Useful for handing to scout leaders.
- Section Report (from Section Complete) — A detailed single-section PDF with standings, lane statistics, heat-by-heat results, and a car statistics matrix.
- Heat Report (from Heat History) — A quick single-page snapshot of one heat's results and current leaderboard.
All reports are generated client-side using jsPDF — no server needed.
3.17 Learn Pin Mapping
When connecting a new Pico W track controller for the first time, use Learn Pins to teach RallyLab which GPIO pins are wired to the gate switch and each lane sensor. Open the Track Manager (click the track badge), then click Learn Pins in the footer.
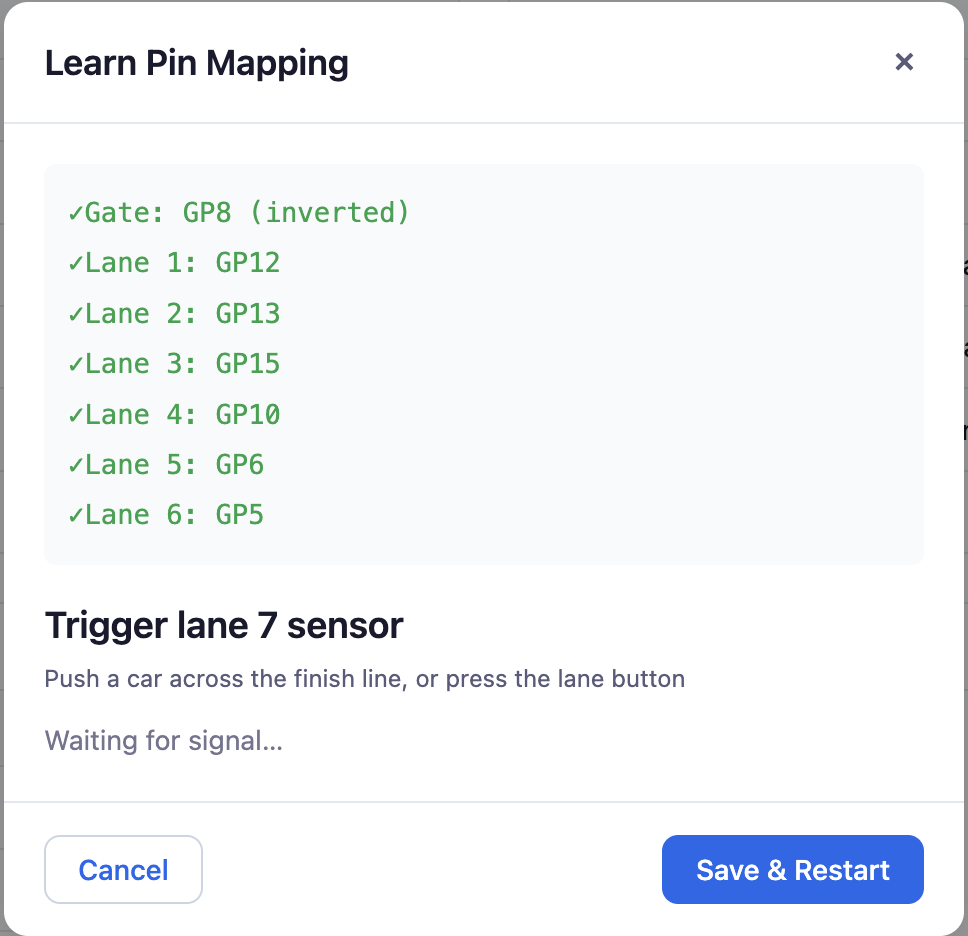
The wizard walks you through each sensor one at a time:
- Open the start gate — release the gate lever or press the gate button. The Pico detects which pin changed and records it.
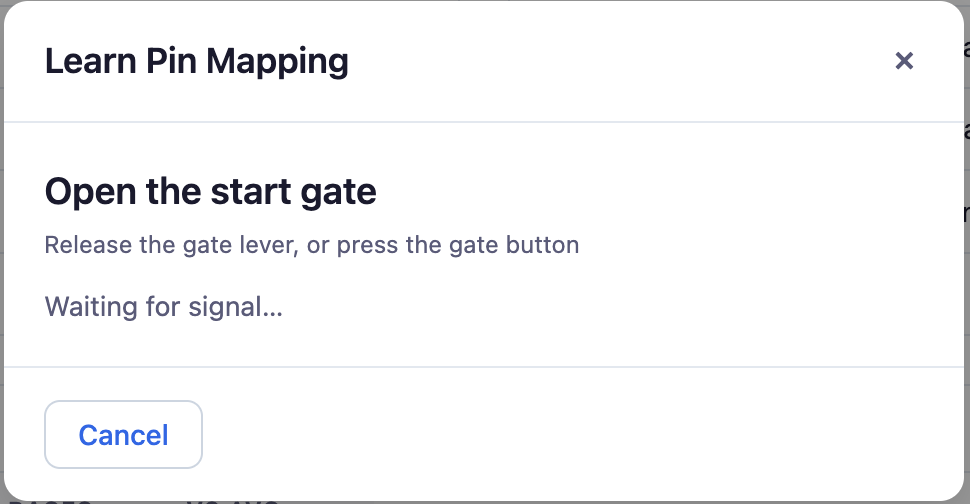
- Trigger each lane sensor — push a car across each finish line in order. Each detected pin is added to the mapping.
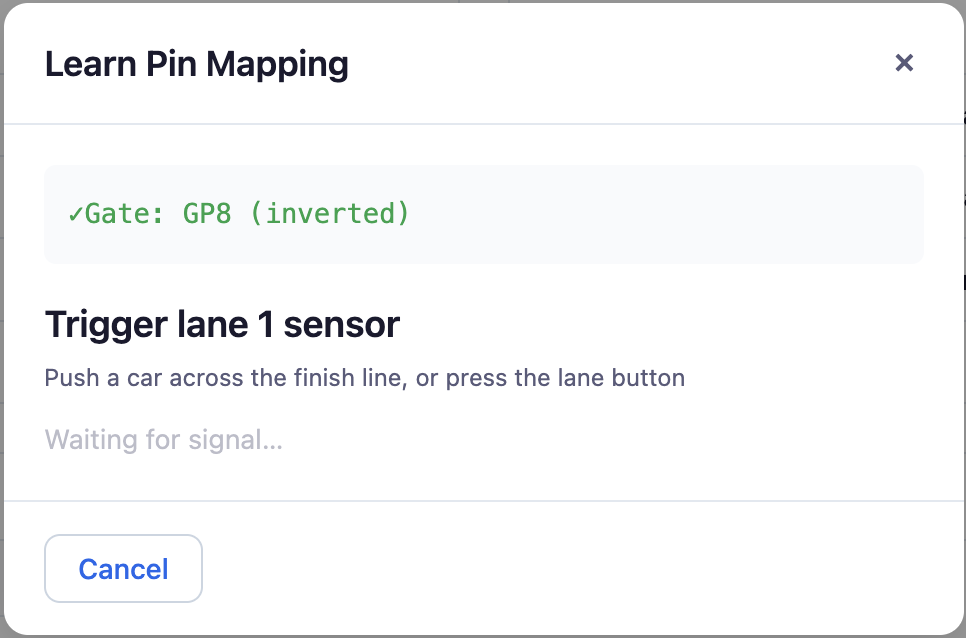
- Save & Restart — once all lanes are mapped, click Save to write the pin configuration to the Pico and restart the firmware.
Chapter 4: Race Day — Registrar
The registrar interface is a simplified check-in view designed for group leaders and section contacts. It shares the same data as the operator console via IndexedDB, so changes made by registrars appear immediately on the operator screen.
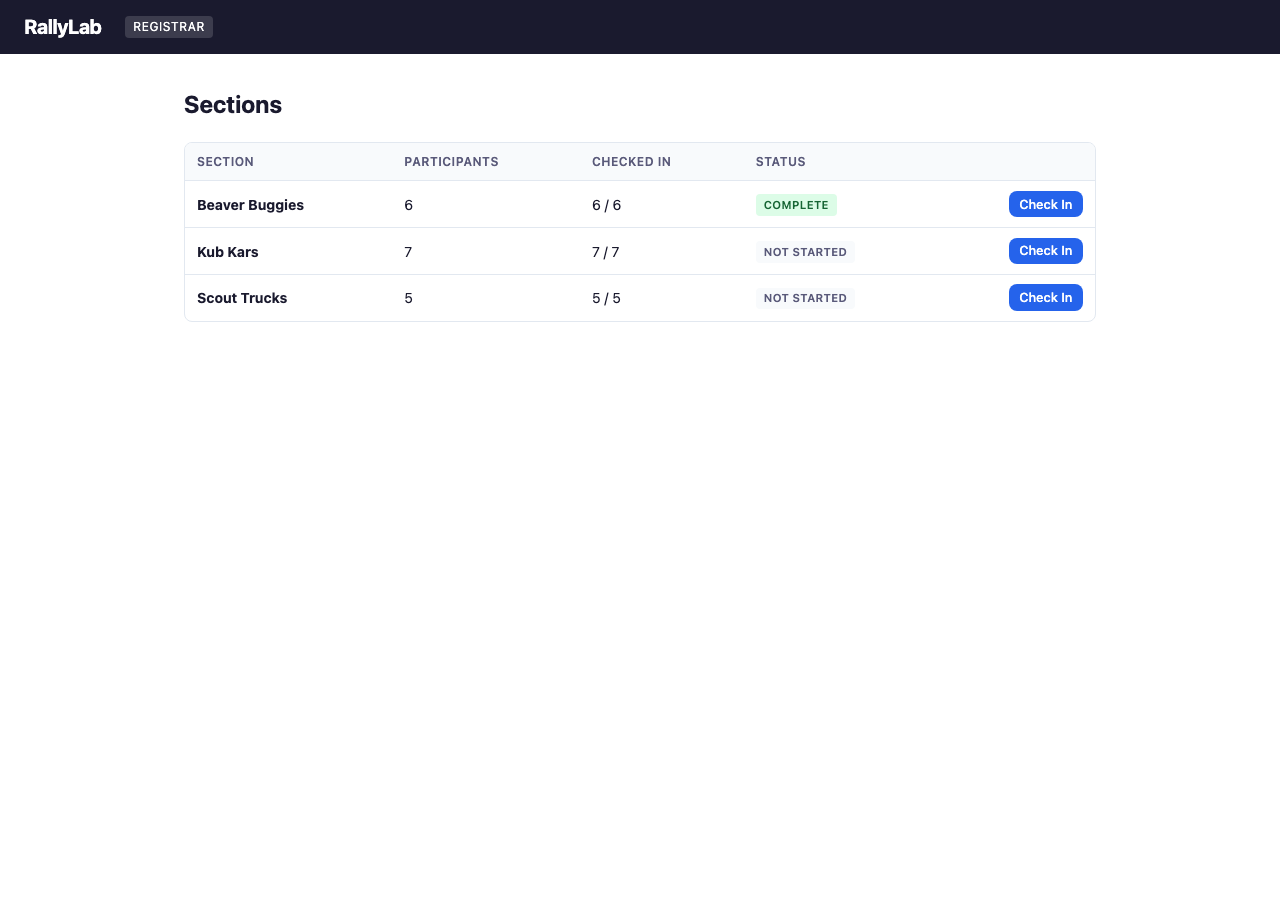
4.1 Section List
The registrar section list shows all sections with participant counts, check-in progress, and status badges.
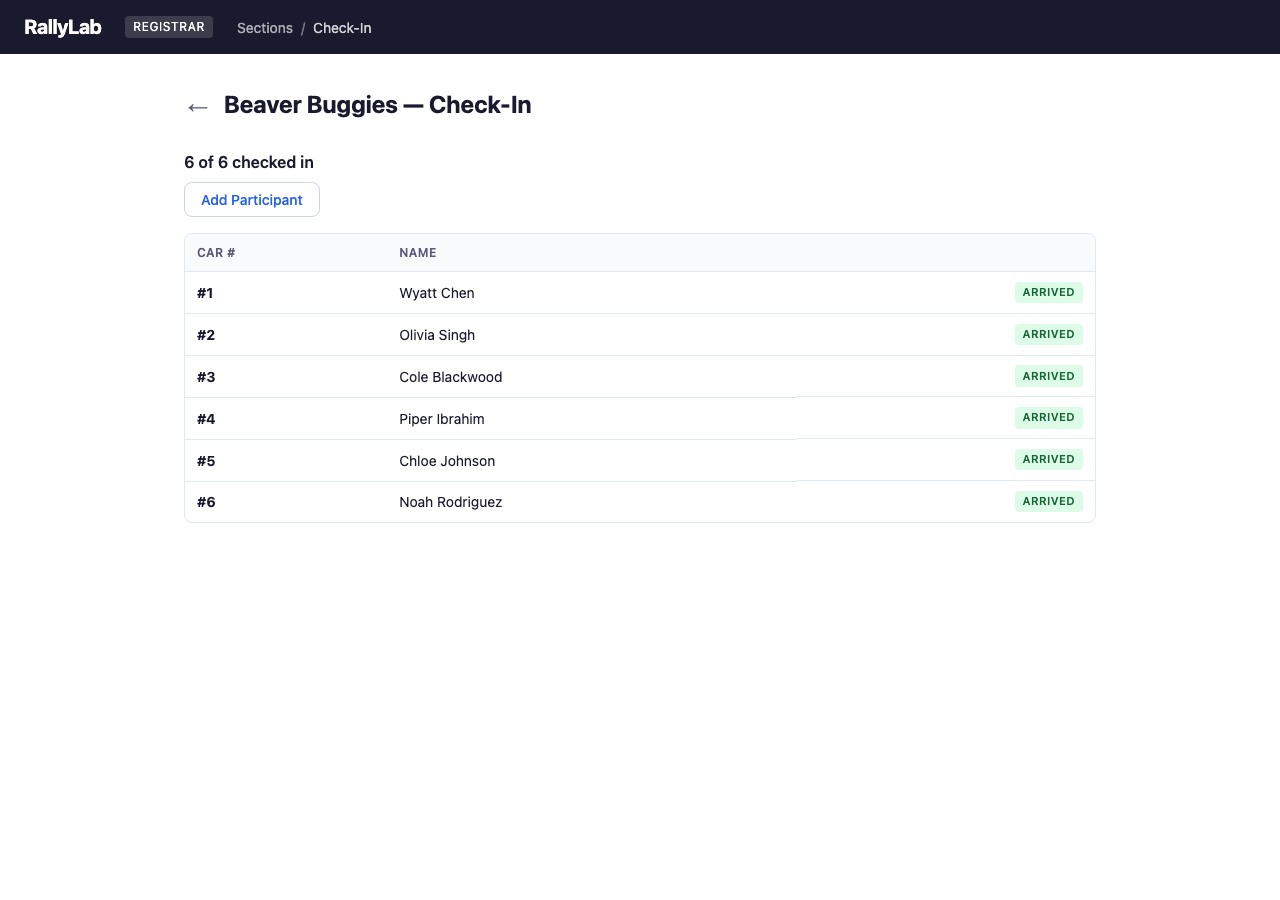
4.2 Section Check-In
The registrar check-in screen shows each participant with a "Check In" button. Checking in a participant marks their car as arrived and updates the count. Late arrivals after racing has started will trigger schedule regeneration.
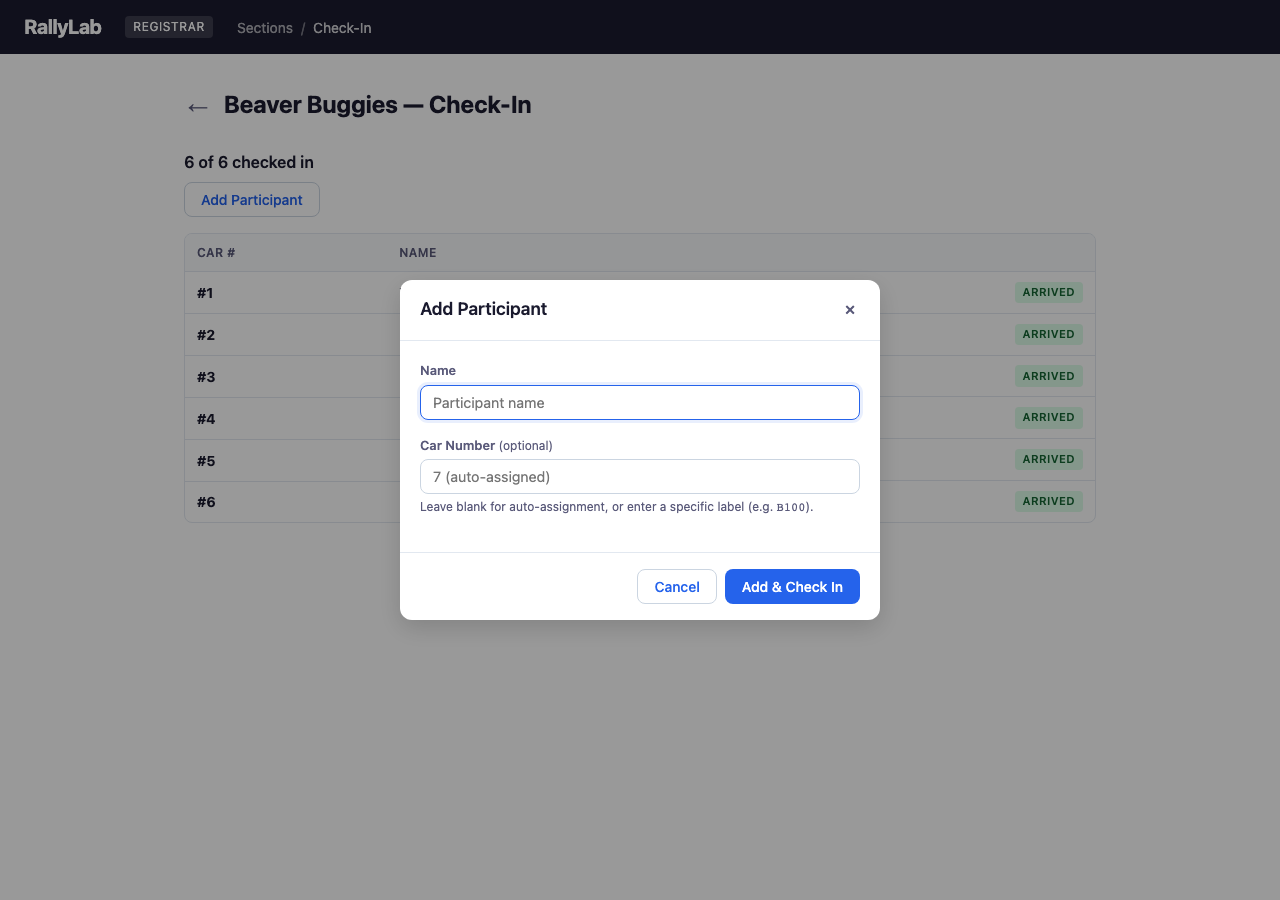
4.3 Adding a Late Participant
The “+ Add Participant” button handles walk-up registrations. Enter the name; leave Car Number blank to auto-assign the next available number, or type a specific label to match the physical car. The participant is added and checked in immediately — and if a section is already racing, the schedule regenerates with catch-up heats.
Chapter 5: Audience Display
The audience display is designed for projectors and large screens. It uses a dark theme with large fonts for maximum visibility. The display is controlled by the operator — it automatically shows the current heat staging, results, and leaderboard as racing progresses.
When a participant belongs to a group (e.g., a pack or colony), the group name appears alongside their car number on every screen, so scouters can track how their group is doing at a glance. The Group column is only shown when at least one participant in the section has a group assigned.
5.1 Welcome
The welcome screen displays the rally name and is shown before racing begins.

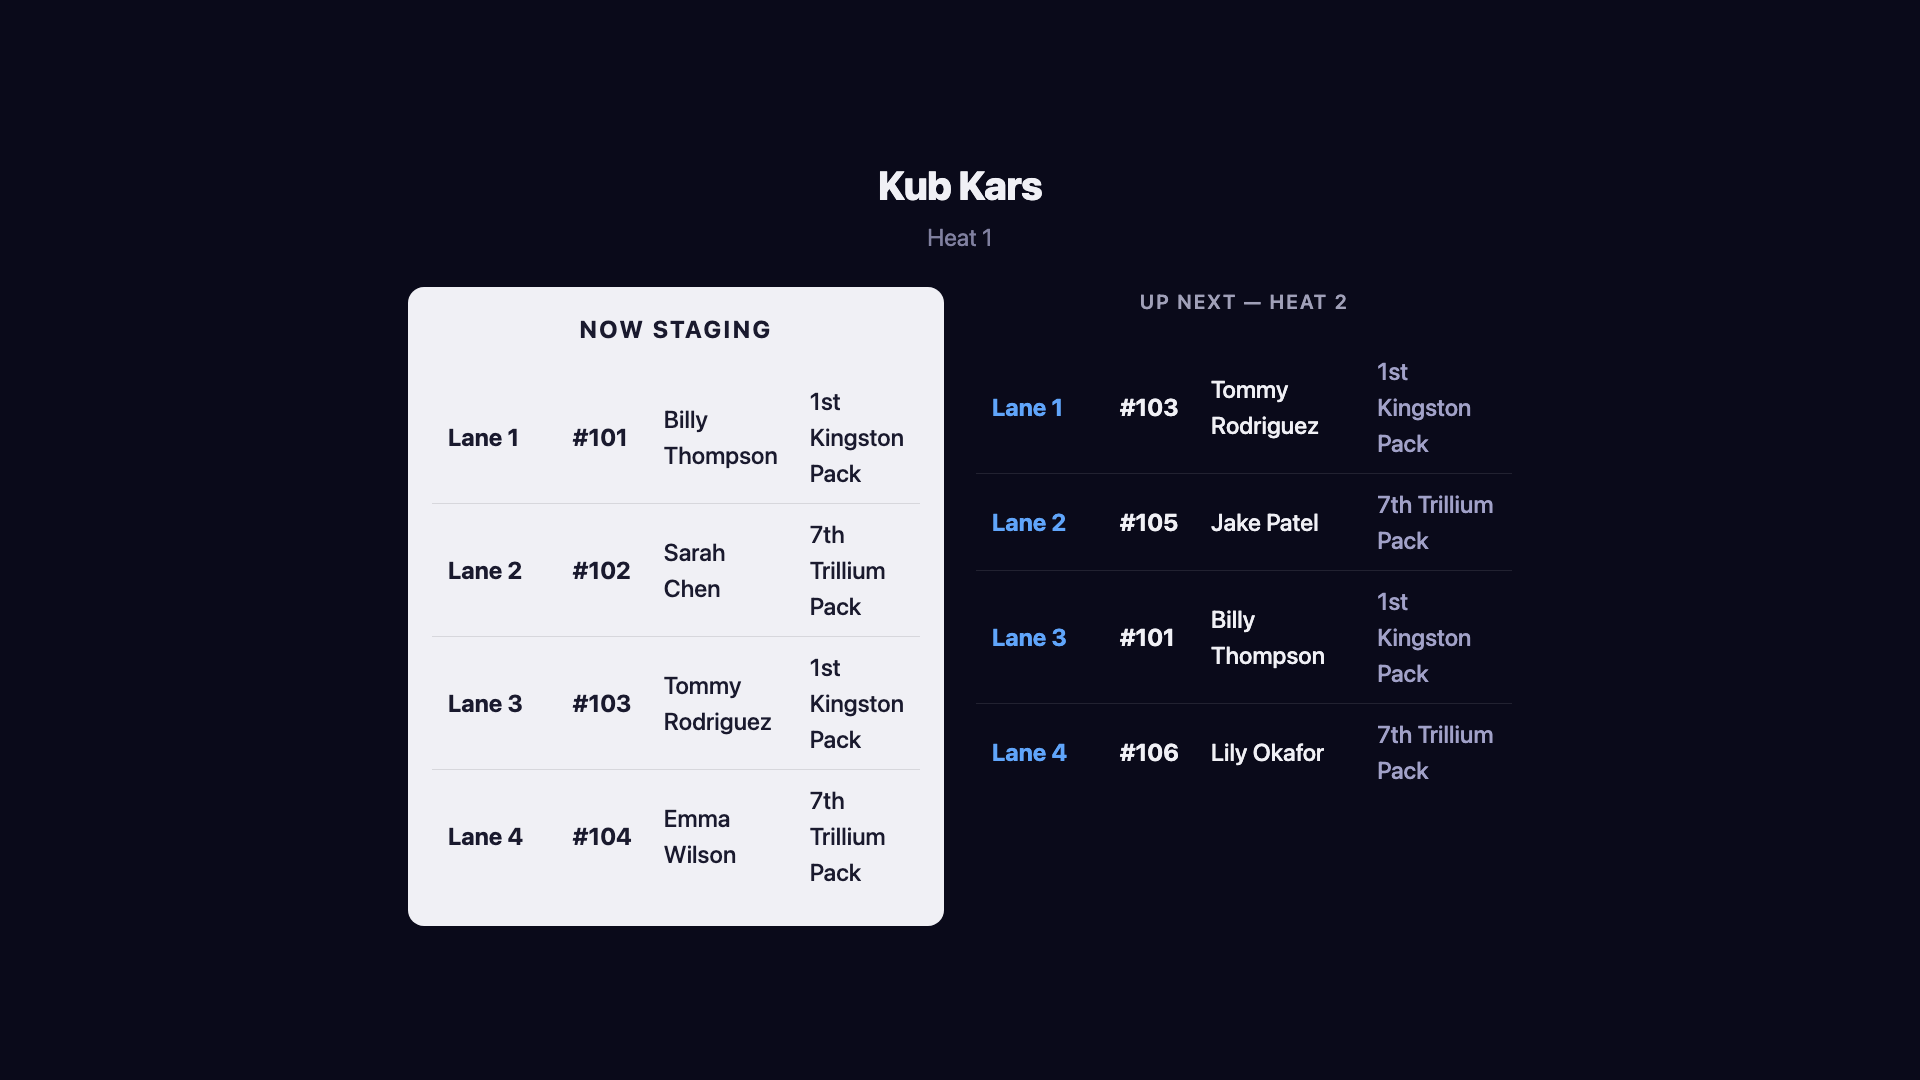
5.2 Heat Staging
During staging, the audience sees the current heat with lane assignments and an "Up Next" preview of the following heat. This helps participants prepare and builds anticipation.
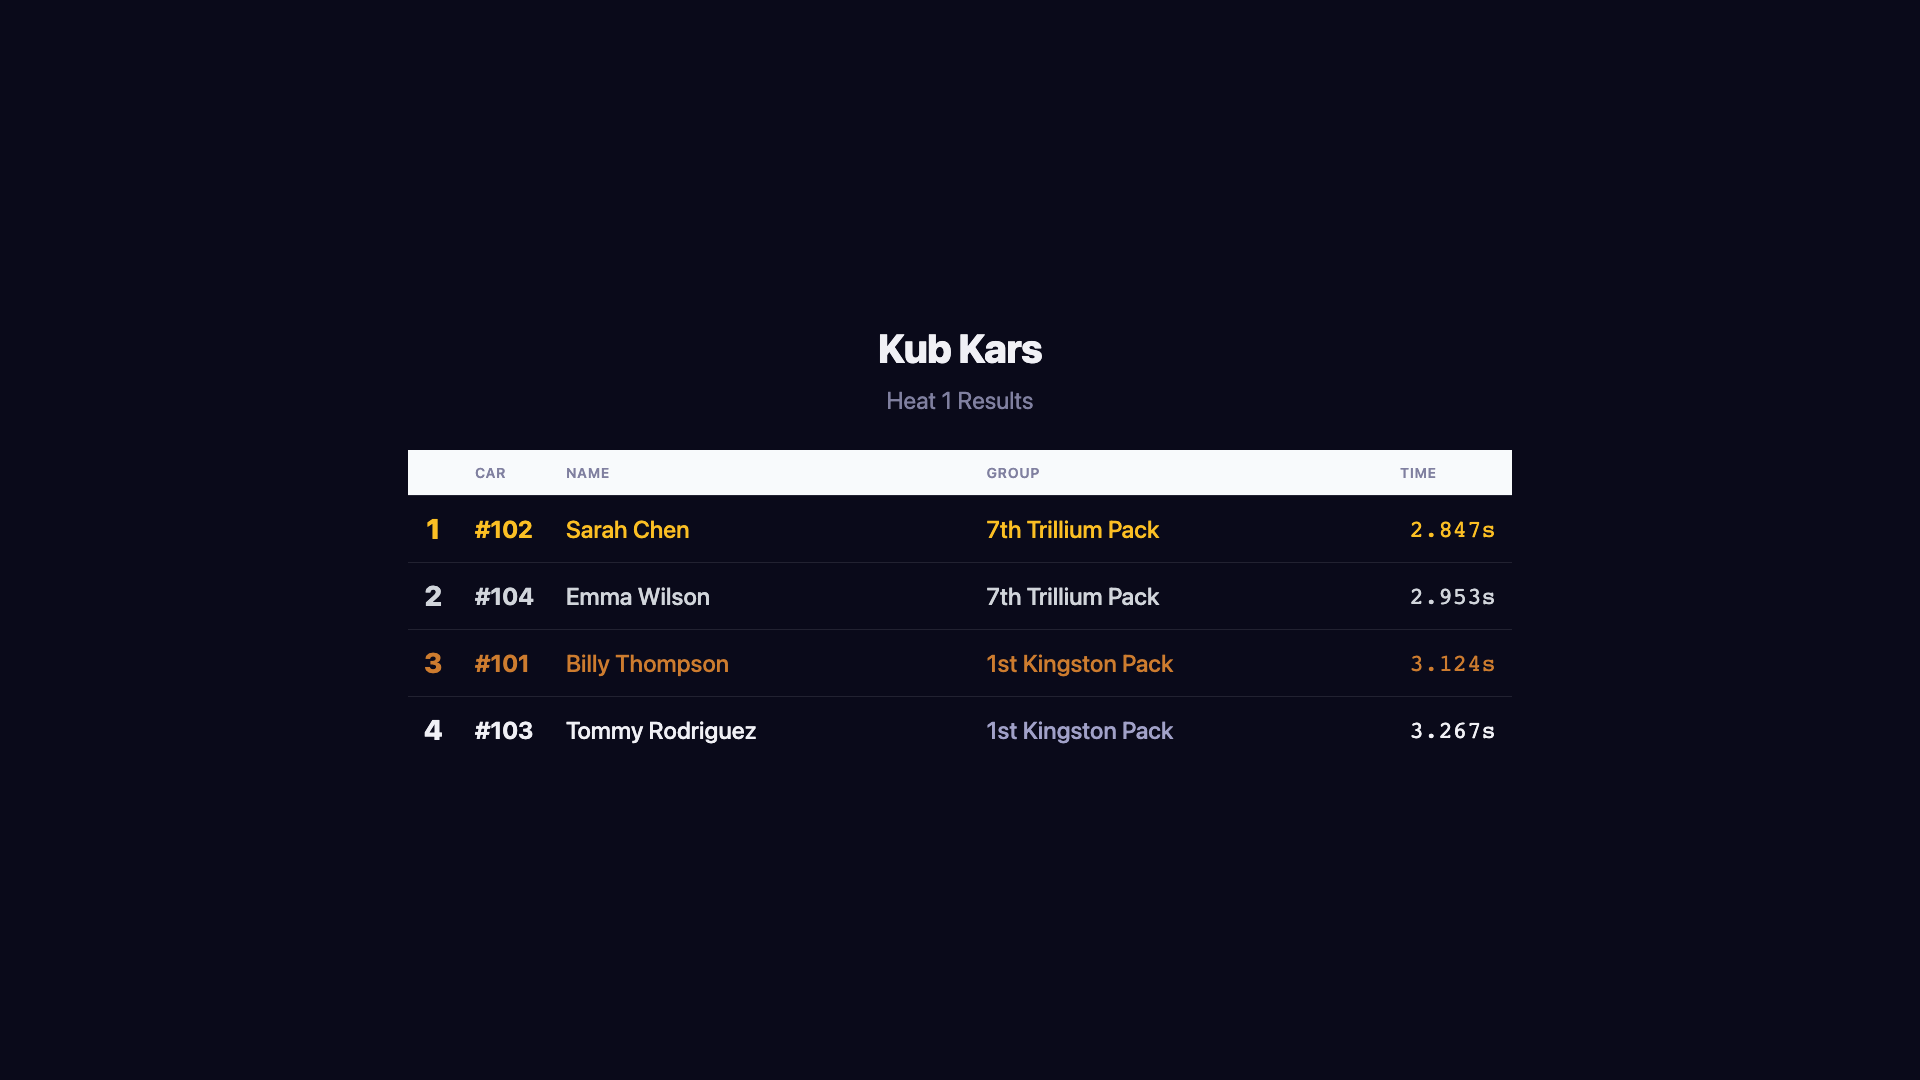
5.3 Heat Results
After each heat, results are displayed with finish times and place indicators (gold, silver, bronze medals for the top 3).
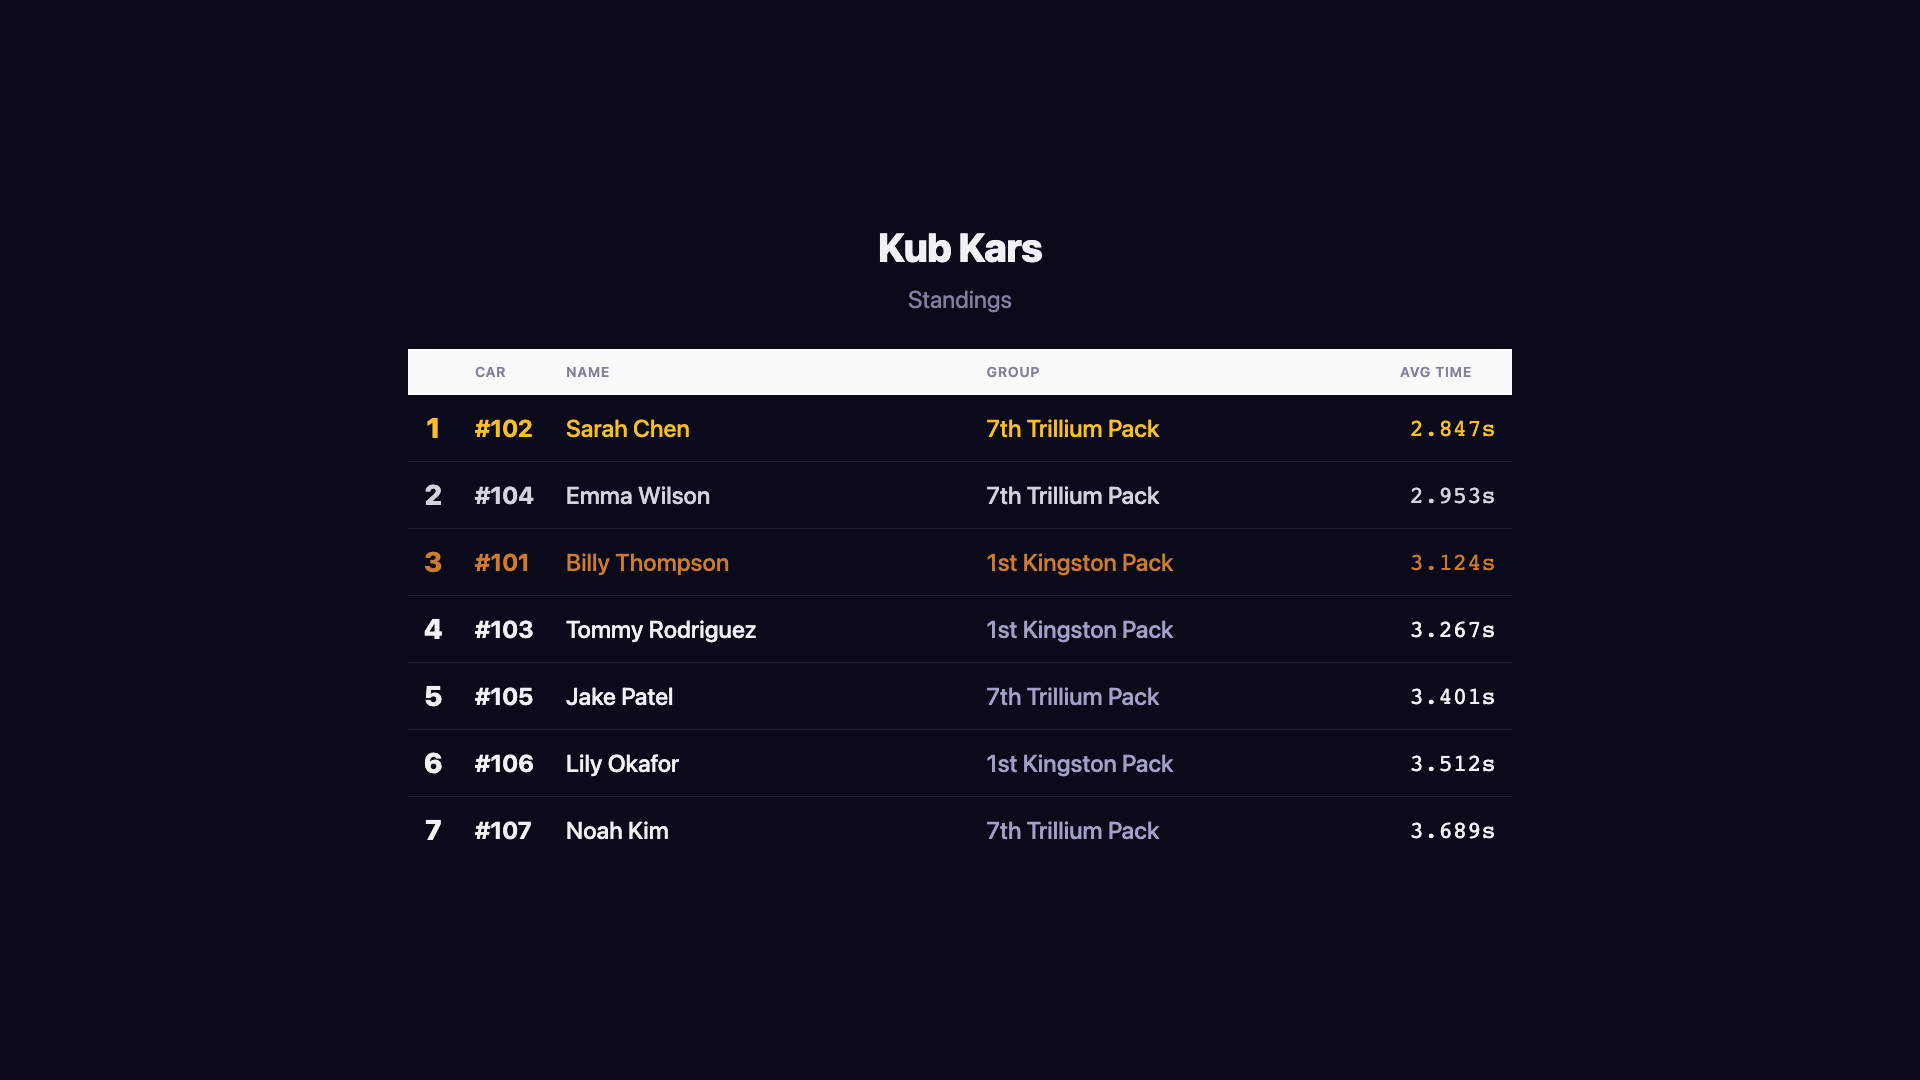
5.4 Leaderboard
The leaderboard shows cumulative standings based on average times across all heats completed so far.
5.5 Section Complete (Progressive Reveal)
When a section finishes, the operator can trigger a dramatic reveal of final standings — starting from last place and building up to first. Medals animate in for the top 3 finishers.
Chapter 7: Pico W Debug Console
A browser-based tool for communicating with the track controller's Raspberry Pi Pico W over USB serial. Requires Chrome or Edge on desktop — the console uses the Web Serial API, which is not available in Firefox or Safari.
7.1 Connecting
Click Connect in the header toolbar and select the Pico W from the browser's serial port picker. The status indicator turns green when connected. Click Disconnect to release the port.
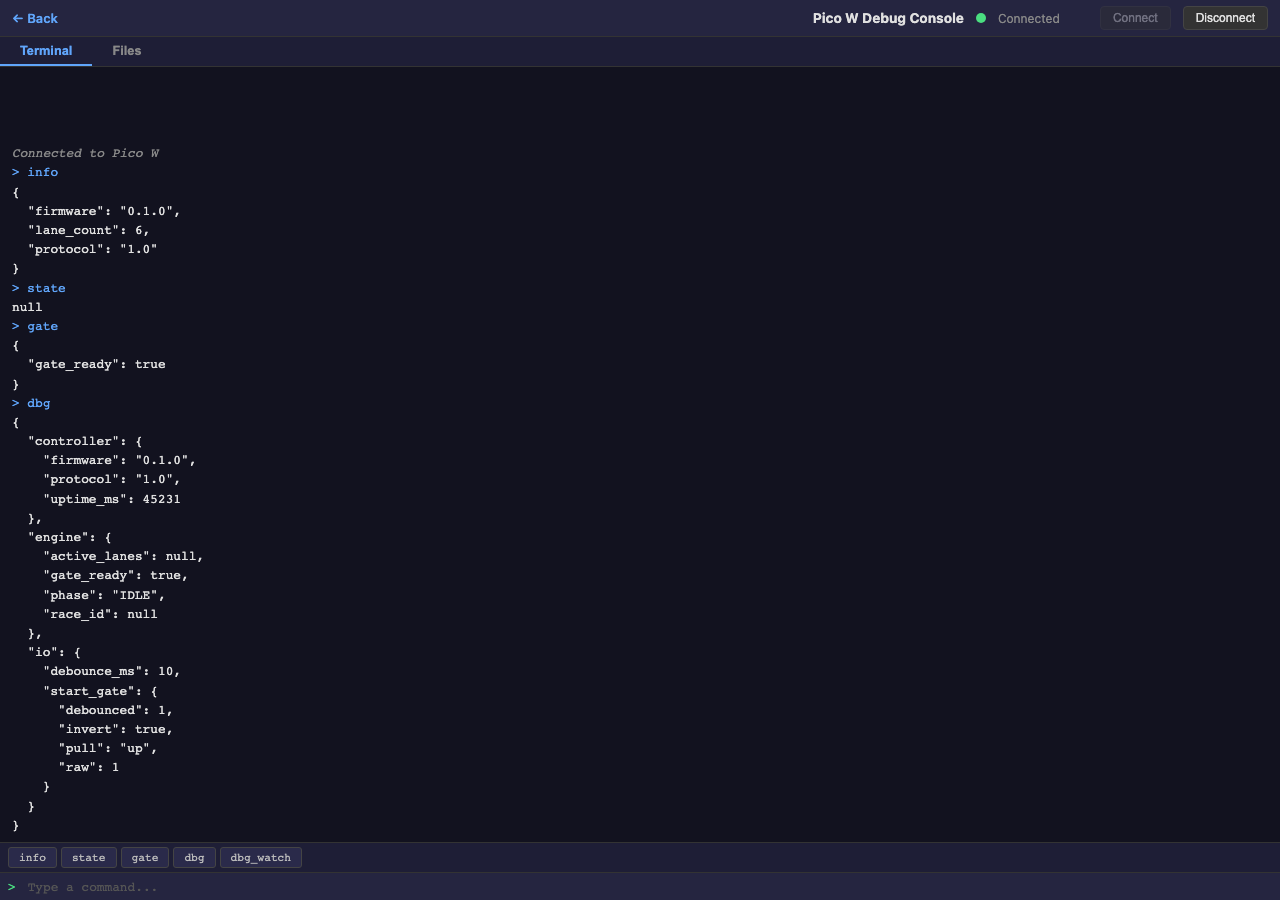
7.2 Terminal Tab
The terminal tab provides a serial console for interacting with the Pico W firmware.
- Type a command in the input field and press Enter to send it
- Use Up/Down arrow keys to recall previous commands from history
- Quick-command buttons below the output send common commands with one click:
info,state,gate,dbg,dbg_watch
Output is color-coded: commands in blue, responses in white, errors in red, and system messages in gray italic.
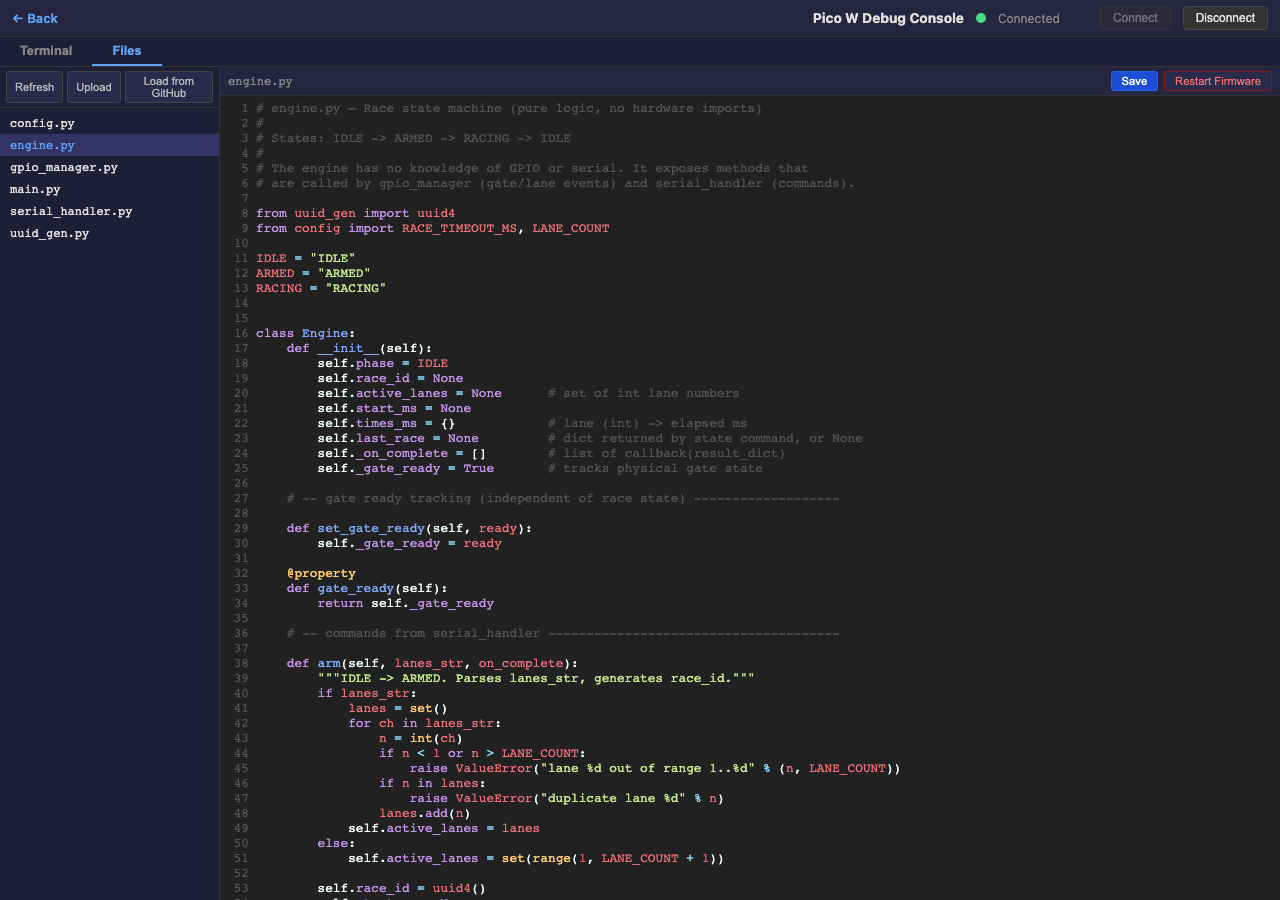
7.3 Files Tab
The files tab provides a file browser and code editor for MicroPython files stored on the Pico W.
- File list (left panel) — shows all files on the device. Click a filename to open it in the editor. Click Refresh to reload the file list
- Editor (right panel) — CodeMirror editor with Python syntax highlighting. Edit the file and click Save (or press Cmd/Ctrl+S) to write it back to the device
- Upload — upload a
.pyfile from your computer to the Pico W - Restart Firmware — soft-resets the Pico W to reload the firmware with any saved changes
Chapter 8: Event Inspector
A developer tool for inspecting the raw event stream stored in IndexedDB. Useful for debugging state issues, verifying event ordering, and understanding how state is derived from events.
8.1 Overview
Open the Event Inspector at event-inspector.html. It reads all domain events from IndexedDB and displays them in a sortable, filterable table. You need to have loaded data first — either demo data from the Operator console, or real rally data from Registration.
8.2 Columns & Filters
The event table shows these columns:
- # — Auto-incremented IndexedDB ID (insertion order)
- Type — Domain event type (e.g., RallyCreated, RaceCompleted). Color-coded: green for pre-race events, amber for race-day events
- Rally ID — Truncated rally UUID. Hover to see the full ID
- Section ID — Truncated section UUID, if the event is section-scoped
- Timestamp — When the event was stored locally
- Synced — Whether the event has been synced to Supabase
Use the filter bar to narrow results by event type, rally, or free-text search across the full JSON payload. The stats bar updates to show the filtered count and type breakdown.
8.3 State Replay
Click any event row to open the detail panel. The Payload tab shows the full event as formatted, syntax-highlighted JSON. Switch to the Replay to Here tab to see the application state that results from replaying all events up to and including the selected one. This uses the same rebuildState() function that powers the Operator console, so the output matches what the application sees.
Appendix A: Domain Language Reference
Authoritative terminology used throughout RallyLab. Consistent use of these terms ensures clear communication between organizers, operators, registrars, and the software.
1. System Layers
Track
The physical wooden track assembly, including:
- Lanes
- Finish switches (normally open)
- Start gate switch (normally closed)
- Wiring and DB15 interface
The Track contains no software intelligence.
Track Controller
The microcontroller hardware and firmware that reads Track switches, detects start gate release and lane finish events, timestamps finish events, and communicates race data to the Race Controller via USB serial or WiFi HTTP. The Track Controller has no knowledge of Participants, Heats, or competition structure.
Race Controller
The computer running race management software. Hosts the web server, Operator Display, and Audience Display. Stores race results and manages competition structure (Heats, Participants, Rally).
2. Human Roles
Operator
The person operating the Race Controller software. Arms the system, oversees race start, declares re-runs when necessary, manages Heats and Races, and finalizes results. The Operator does not physically release the starting gate.
Track Operator
The person managing the physical Track hardware. Loads cars onto lanes, ensures cars are properly staged, physically releases the starting gate, and monitors physical track condition.
Audience
Spectators watching the race — youth, parents, friends, and Scouters.
3. UI Surfaces
Operator Display
The browser interface used by the Operator. Provides control, monitoring, and race management tools.
Audience Display
The browser interface shown publicly. Provides high-visibility race visuals and results.
4. Race Lifecycle
Arm
Operator action that prepares the system to detect a race start. The Track Controller begins monitoring the start gate, finish lane timers are cleared, and the system enters the Armed state.
Armed (State)
System state in which the start gate is closed, the system is waiting for gate release, and no timing has started.
Start
The moment the start gate transitions from closed to open. Detected by the Track Controller. The race clock starts, lane timers become active, and the system enters the Running state. Start is detected, not initiated by software.
Running (State)
The race is in progress. At least one lane has not yet finished.
Finish (Lane Finish)
The moment a specific lane's finish switch transitions from open to closed. That lane's time is frozen and the lane is marked Finished. Each lane finishes independently.
Complete (Race Complete)
State reached when all active lanes have finished. No automatic timeout is defined. The Operator may intervene if a race cannot complete normally.
Re-run
Operator decision that the current race result is invalid. Recorded times are discarded and the Heat is run again.
Reset
Operator action that clears lane results, returns the system to Idle state, and prepares for the next Arm.
5. Competition Structure
Lane
A numbered physical path on the Track. Has a lane number, an assigned Participant (per Heat), and a finish time (per Race).
Participant
A person entered in the competition. Properties include name, car name (optional), and group/rank (optional).
Heat
A scheduled grouping of Participants assigned to lanes for one Race. A Heat may require a Re-run.
Race
A single timed run of a Heat. A Heat may have one valid Race or multiple attempts (if Re-run is declared). A Heat is the scheduled assignment; a Race is the physical execution.
Rally
The full competition (a pinewood derby race day). Contains all Participants, all Heats, and all Results. "Rally" is the preferred term over "Event" or "Meet".
6. Design Boundary Principle
The Track Controller knows nothing about Participants. The Race Controller knows nothing about physical switch wiring.
The Race Controller governs competition structure (Rally, Heat, Race) and software state. The Track hardware and Track Operator govern physical staging and gate release. The Track Controller bridges physical events into the software domain but does not interpret competition rules.
This separation is intentional and foundational.
7. Operational Modes
Dry Run Mode
A non-competitive operational mode used for testing hardware and software. No results are persisted as official, participants may not be assigned. Used for validation, setup, or demonstrations.
Rally Mode
Competitive operational mode. Heats and Races are recorded as official results. Results are persisted and standings contribute to the Rally.